HorizonSight 360° a Helmet-Integrated Rear-Awareness AR and Mission-Control Vision System
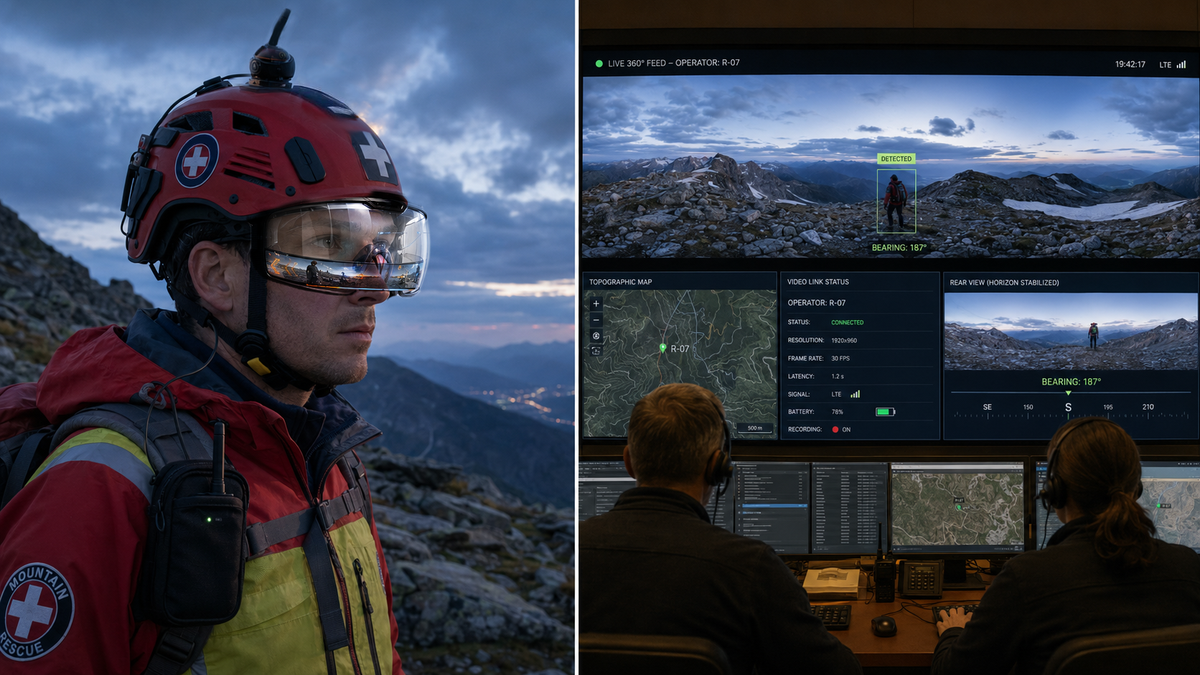
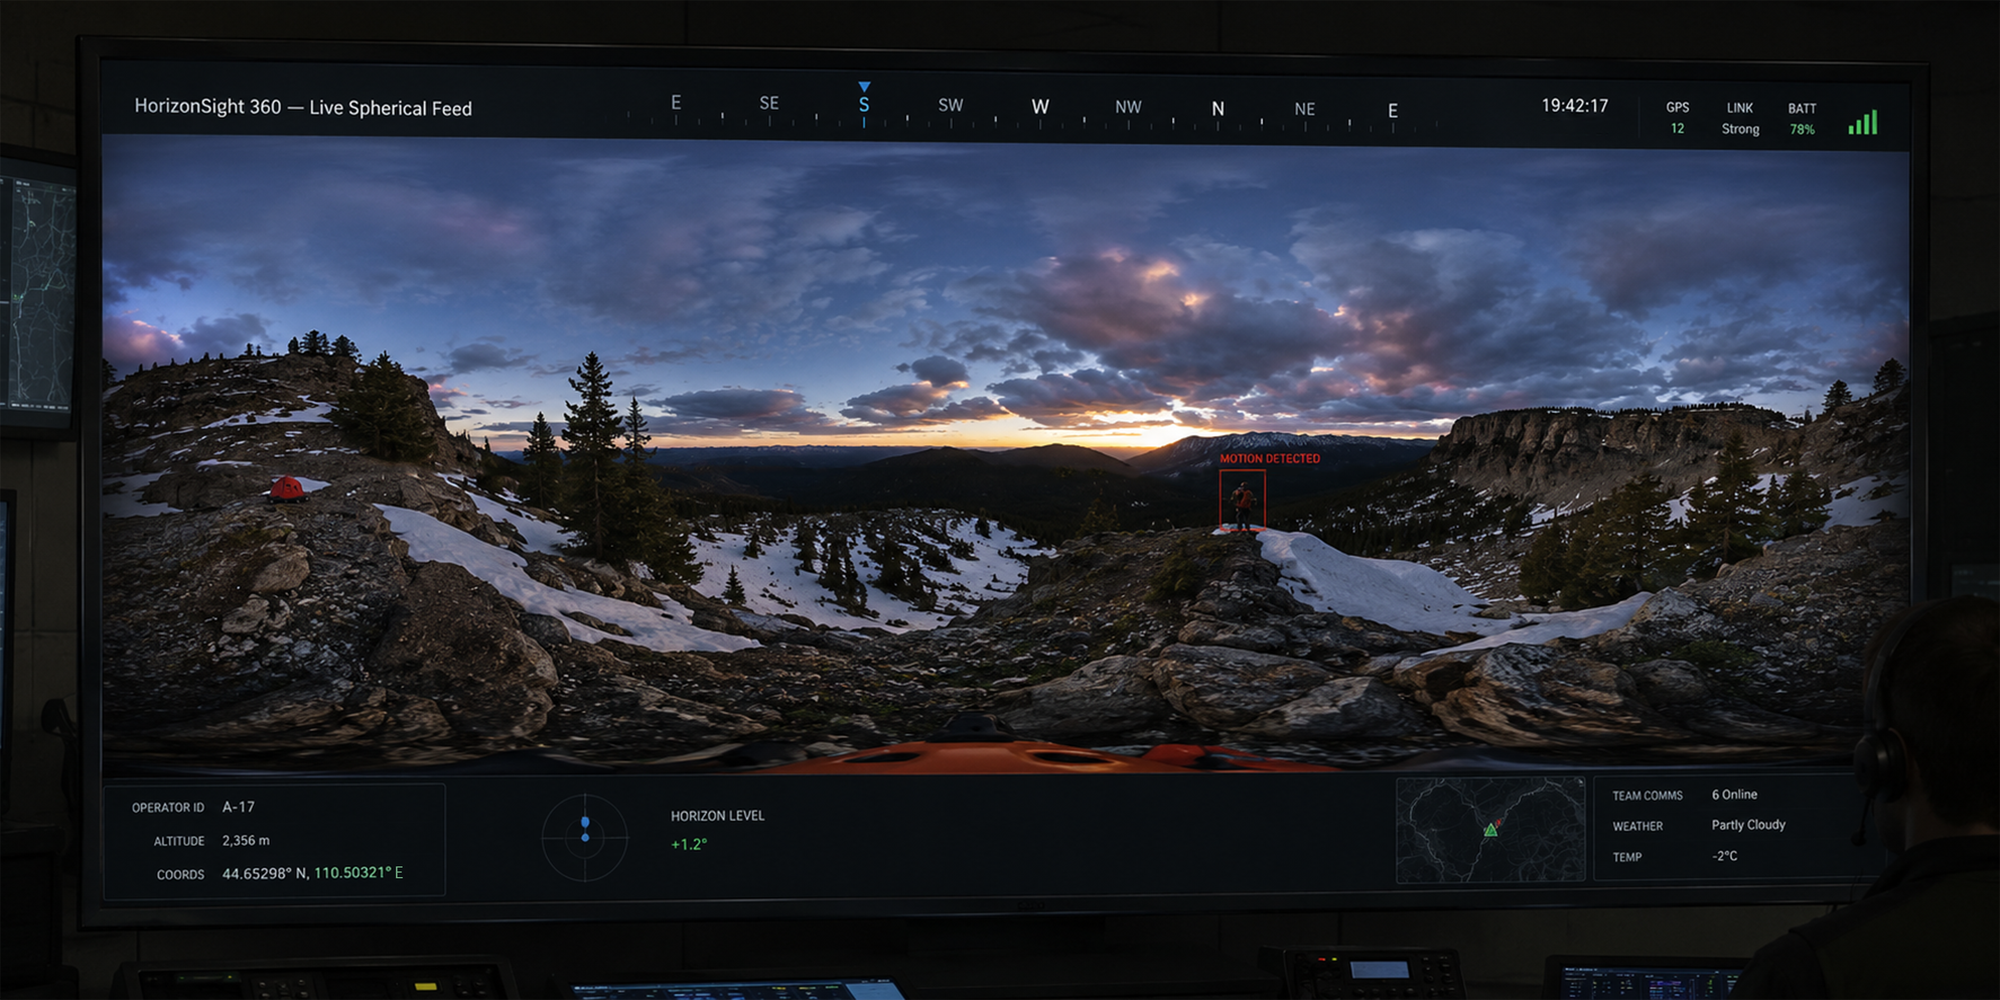
HorizonSight 360 gives a helmeted operator eyes in the back of their head, and gives their team eyes everywhere at once.

Peripheral 360° Rear-Awareness Helmet System
v1 Prototype Pilot Build
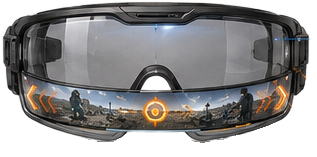
A helmet-integrated situational-awareness system that maps the rearward hemisphere into a stabilized, semi-transparent HUD in the lower visual field, while preserving unobstructed natural forward vision.
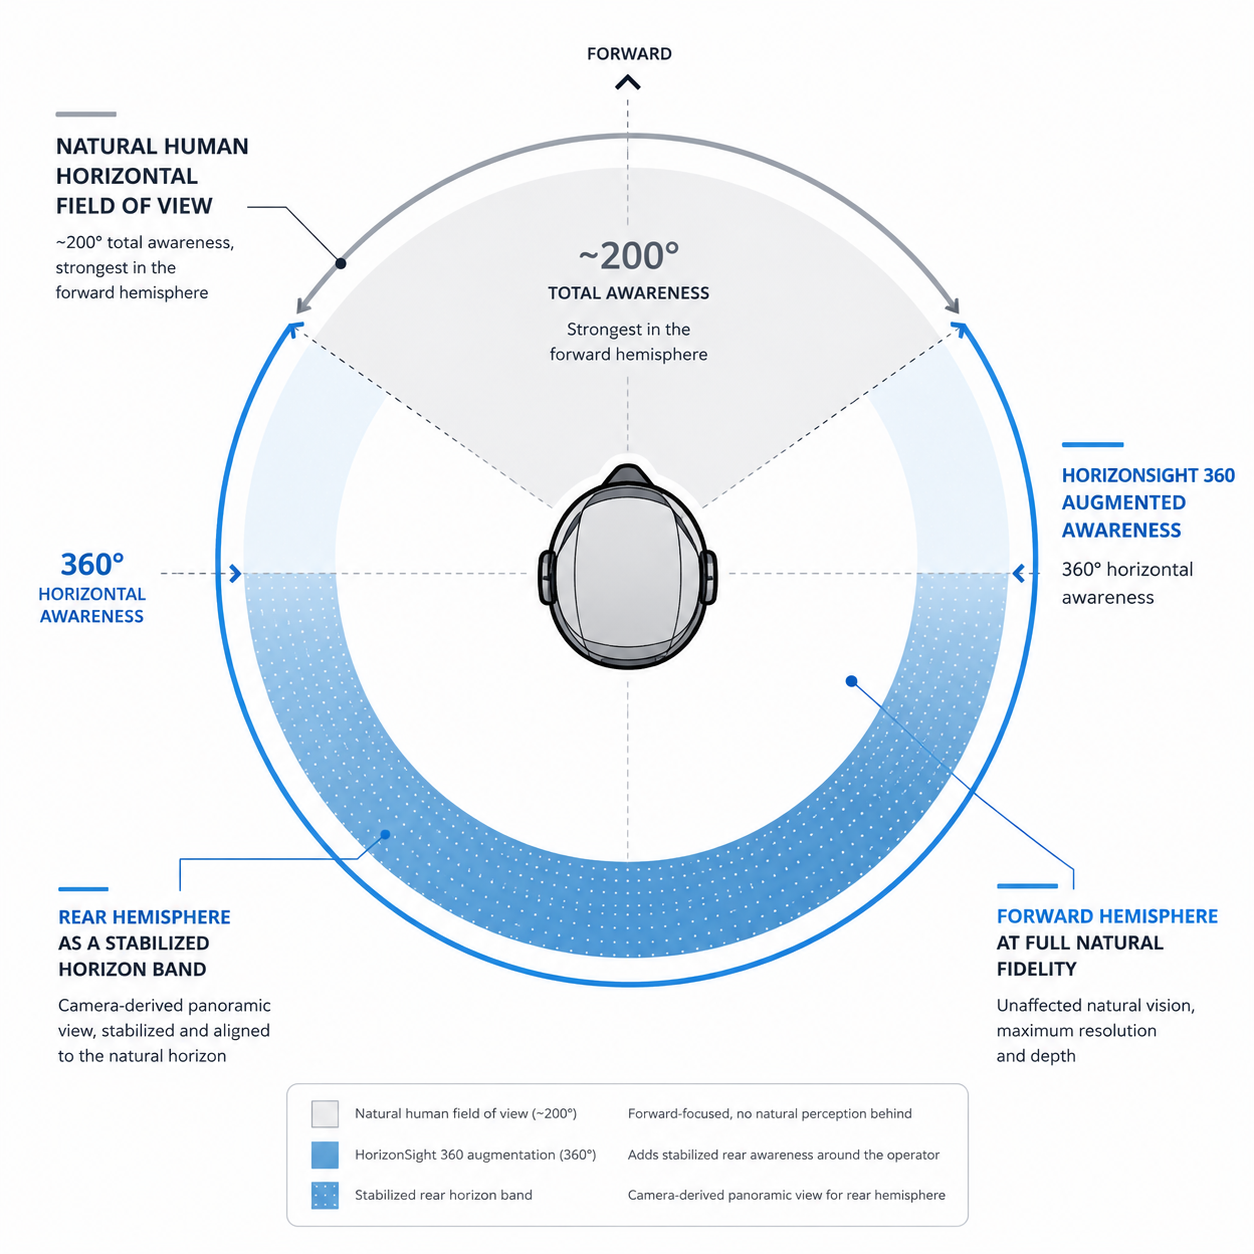
360° horizontal awareness; forward hemisphere at full natural fidelity, rear hemisphere as a stabilized horizon band. The remote operator gets the near-full visual sphere
- License: Hardware — CERN-OHL-S v2. Documentation — CC BY-SA 4.0.
- Version: 1.0 (pilot prototype) — Date: 7 July 2026.
TL;DR
- You can build a working, see-through rear-awareness HUD for roughly $210–290 (salvage/cheapest) or ~$510–700 for the recommended v1 (Raspberry Pi 5 8 GB + dual-fisheye USB camera + a $145 0.39" micro-OLED-plus-prism kit combined into the lower lens), staying far under the $5,000 ceiling. The recommended architecture is a micro-OLED + beam-splitter combiner in the lower visual field — it is the only see-through option that is simultaneously cheap, hand-buildable, and bright enough to read.
- Accept ~150–200 ms glass-to-glass latency for v1 — adequate for "something is approaching from behind," not for maneuvering. Treat the low-latency path, on-board AI object detection (Coral/Jetson), and full-sphere streaming to remote mission control (HorizonSight 360, ~$1,300–2,000) as documented upgrades, not requirements.
- The single most important caveat is legal/safety, not technical: attaching anything to a certified helmet almost always voids its certification (EN 1078, ASTM F1447, EN 397, ANSI Z89.1) and the manufacturer's liability. Build on a dedicated non-relied-upon helmet or as a fully removable, non-penetrating clip, keep on-head mass minimal, and never treat this prototype as certified PPE or a substitute for shoulder checks.
Key Findings
- The compute is cheap but its price is unusually volatile. A Raspberry Pi 5 8 GB is the right v1 brain (best-supported camera/OpenCV stack), but 2026 DRAM shortages have pushed prices up sharply — the 16 GB Pi 5 jumped from $120 to $205, "over 70% more expensive than original MSRP," per Tom's Hardware. Budget accordingly and consider a salvaged Pi 4.
- A single off-the-shelf part collapses most of the optical risk. A 0.39" micro-OLED kit ships with a magnifier prism and HDMI driver board for $145 (yxmicrodisplay.com) This is what makes the see-through HUD DIY-feasible; waveguides are not hand-fabricable and were rejected.
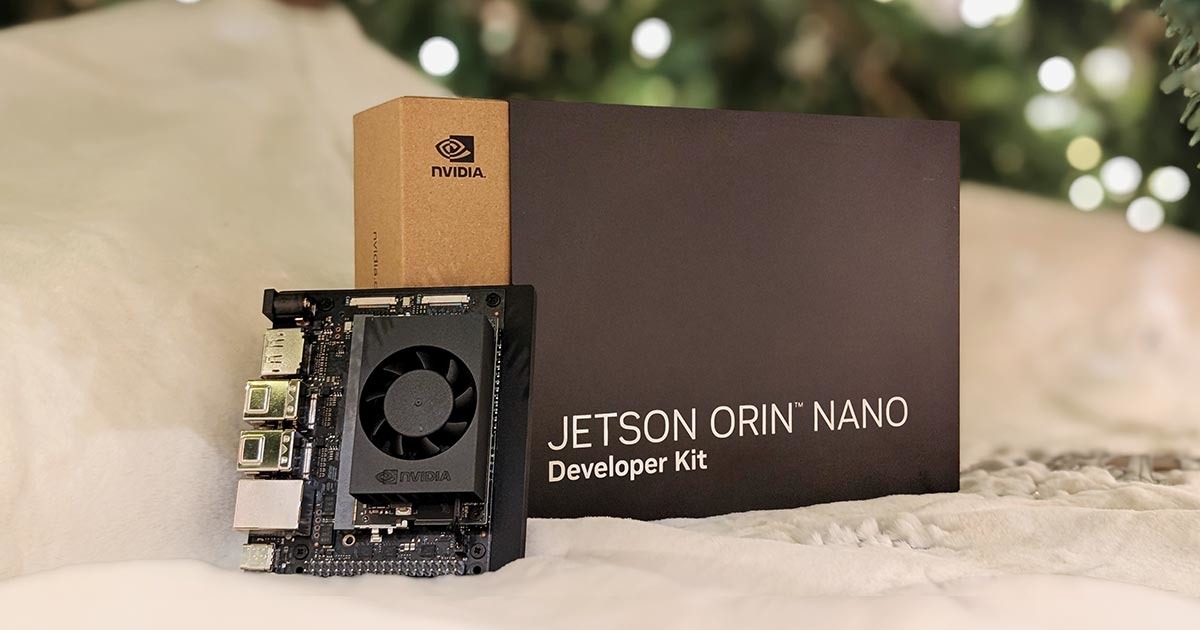
- The AI upgrade path is affordable. The NVIDIA Jetson Orin Nano Super dev kit "delivers up to 67 TOPS of AI performance… At just $249" (nvidia.com), with 102 GB/s bandwidth. Staying on the Pi, a Google Coral USB accelerator is "capable of performing 4 trillion operations per second (4 TOPS)… execute state-of-the-art mobile vision models such as MobileNet v2 at almost 400 frames per second" (coral.ai).
- No commercial product does exactly this. The closest safety analogue, the radar-only Garmin Varia RVR315 (~$149.99), gives an alert with no image; the camera-equipped Varia RCT715 has "a suggested retail price of $399.99" (Garmin newsroom) but still no live rear HUD; the newer RearVue 820 is $299.99. Industrial AR helmets are forward-focused and cost 3–10× the full upgrade path.
- ~200 ms live streaming is a solved problem on this hardware. WebRTC stacks (MediaMTX, TzuHuanTai/RaspberryPi-WebRTC) hit ~0.2 s latency on a Pi 5, enabling the HorizonSight mission-control feed over SATCOM/WiFi/LTE.
Details
1. At-a-Glance
| Item | Value |
|---|---|
| Cheapest working path | ~$210–290 USD (salvaged SBC, single rear camera, peripheral LCD/EVF) |
| Recommended v1 path | ~$510–700 USD (Pi 5 8 GB, dual-fisheye USB cam, 0.39" micro-OLED + combiner) |
| Upgraded path (HorizonSight 360) | ~$1,300–2,000 USD (Jetson Orin Nano Super or Pi 5 + Coral, LTE streaming) |
| Budget ceiling | $2,500 (this build stays far below it) |
| Estimated build time | 30–50 hours over 2–4 weekends |
| Difficulty | Intermediate–Advanced (Linux, soldering, basic optics alignment, 3D print or hand-fab) |
| Key tools | Soldering iron, multimeter, 3D printer (or print service), calipers, small hand tools, PC for calibration |
Prices are estimates and vary by region and date. Single-board-computer and RAM prices are exceptionally volatile in 2026. Verify all prices, local laws, and electrical safety yourself before building.
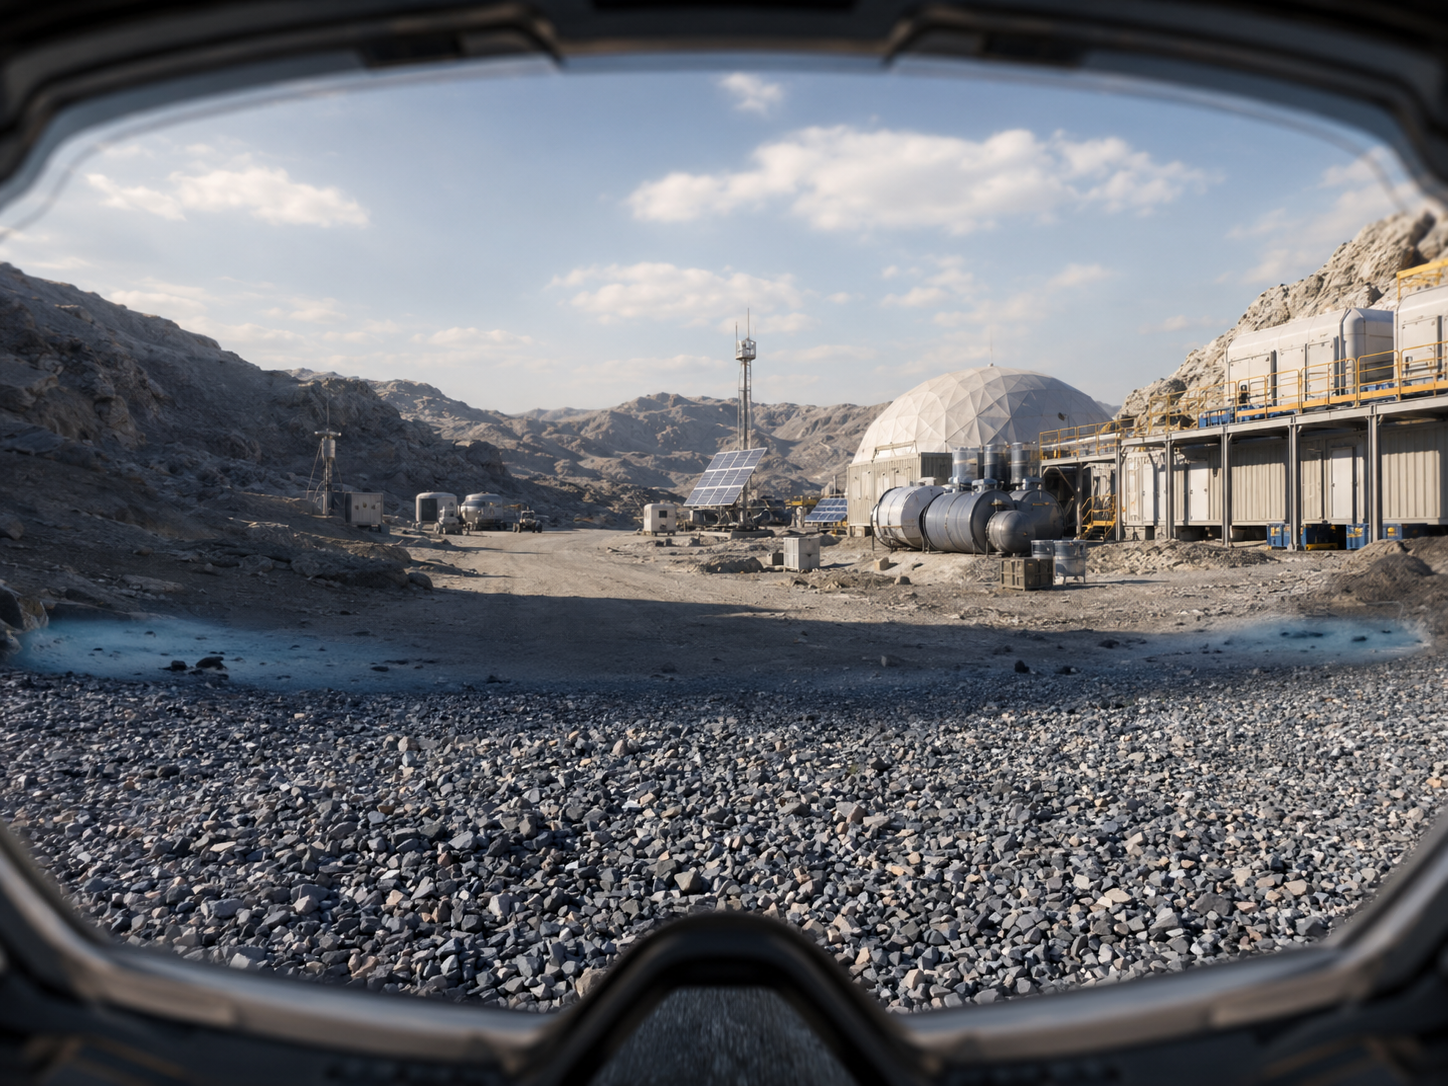
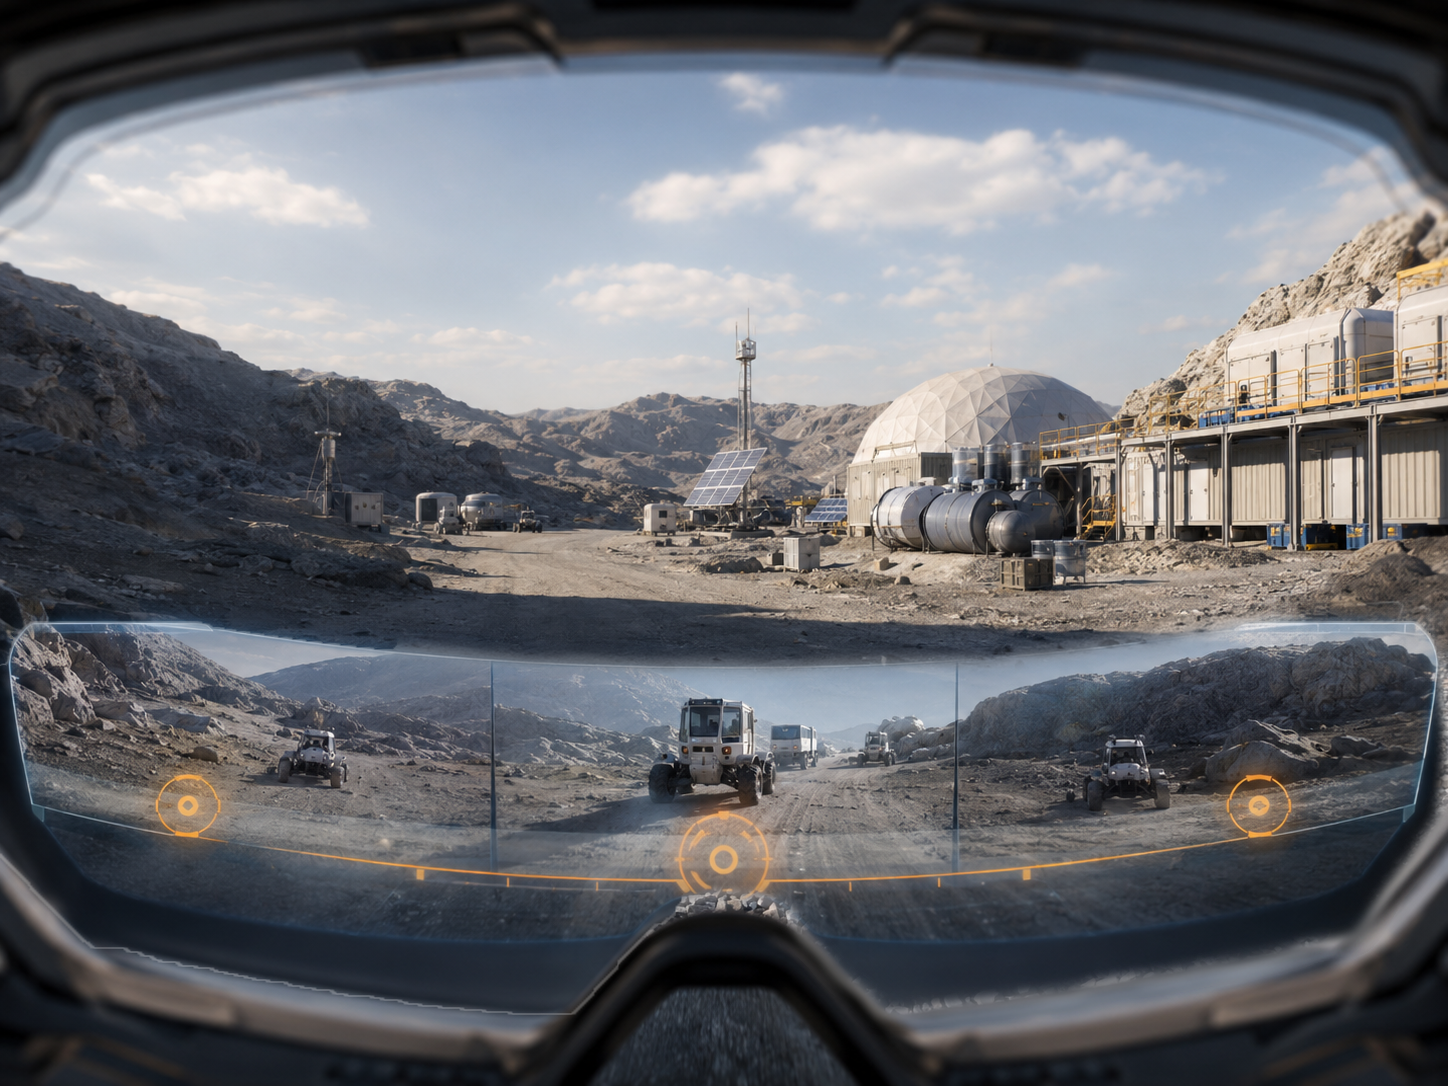
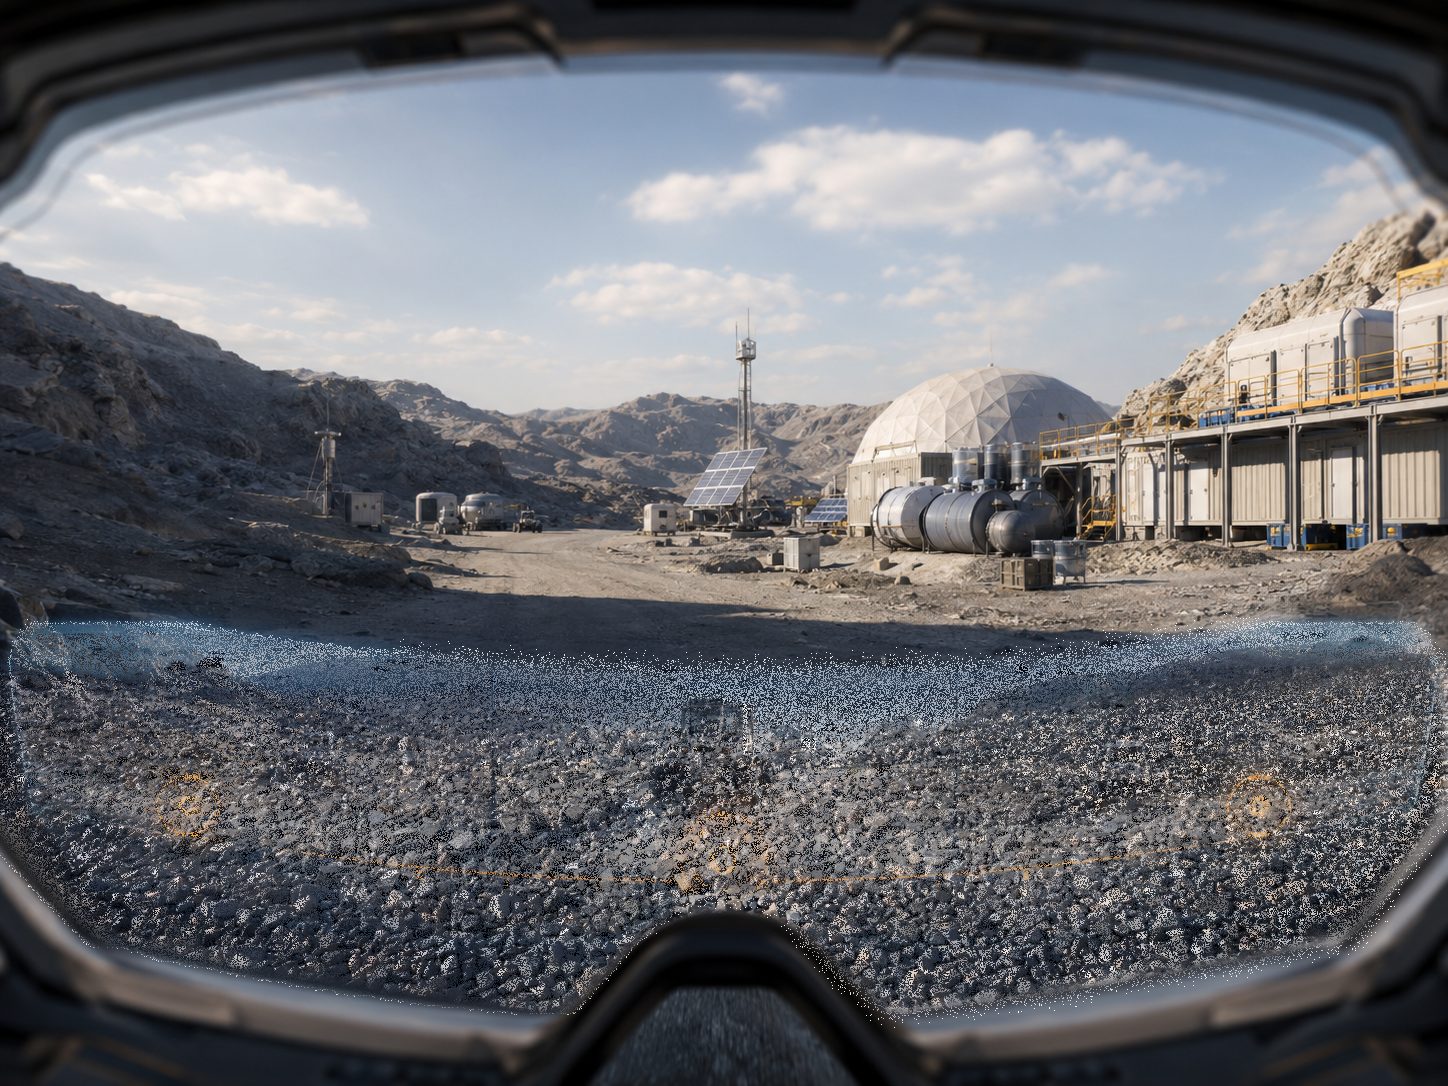
Whether via on-board controls, or purely psychological filtering with semi-transparent HUD; the effect is pictured above. It allows you to have simultaneous peripheral awareness of your forward and rearview surroundings. The mission control upgrade also facilitates a remote operator to observe your surroundings in 360° view.
2. Abstract / Purpose
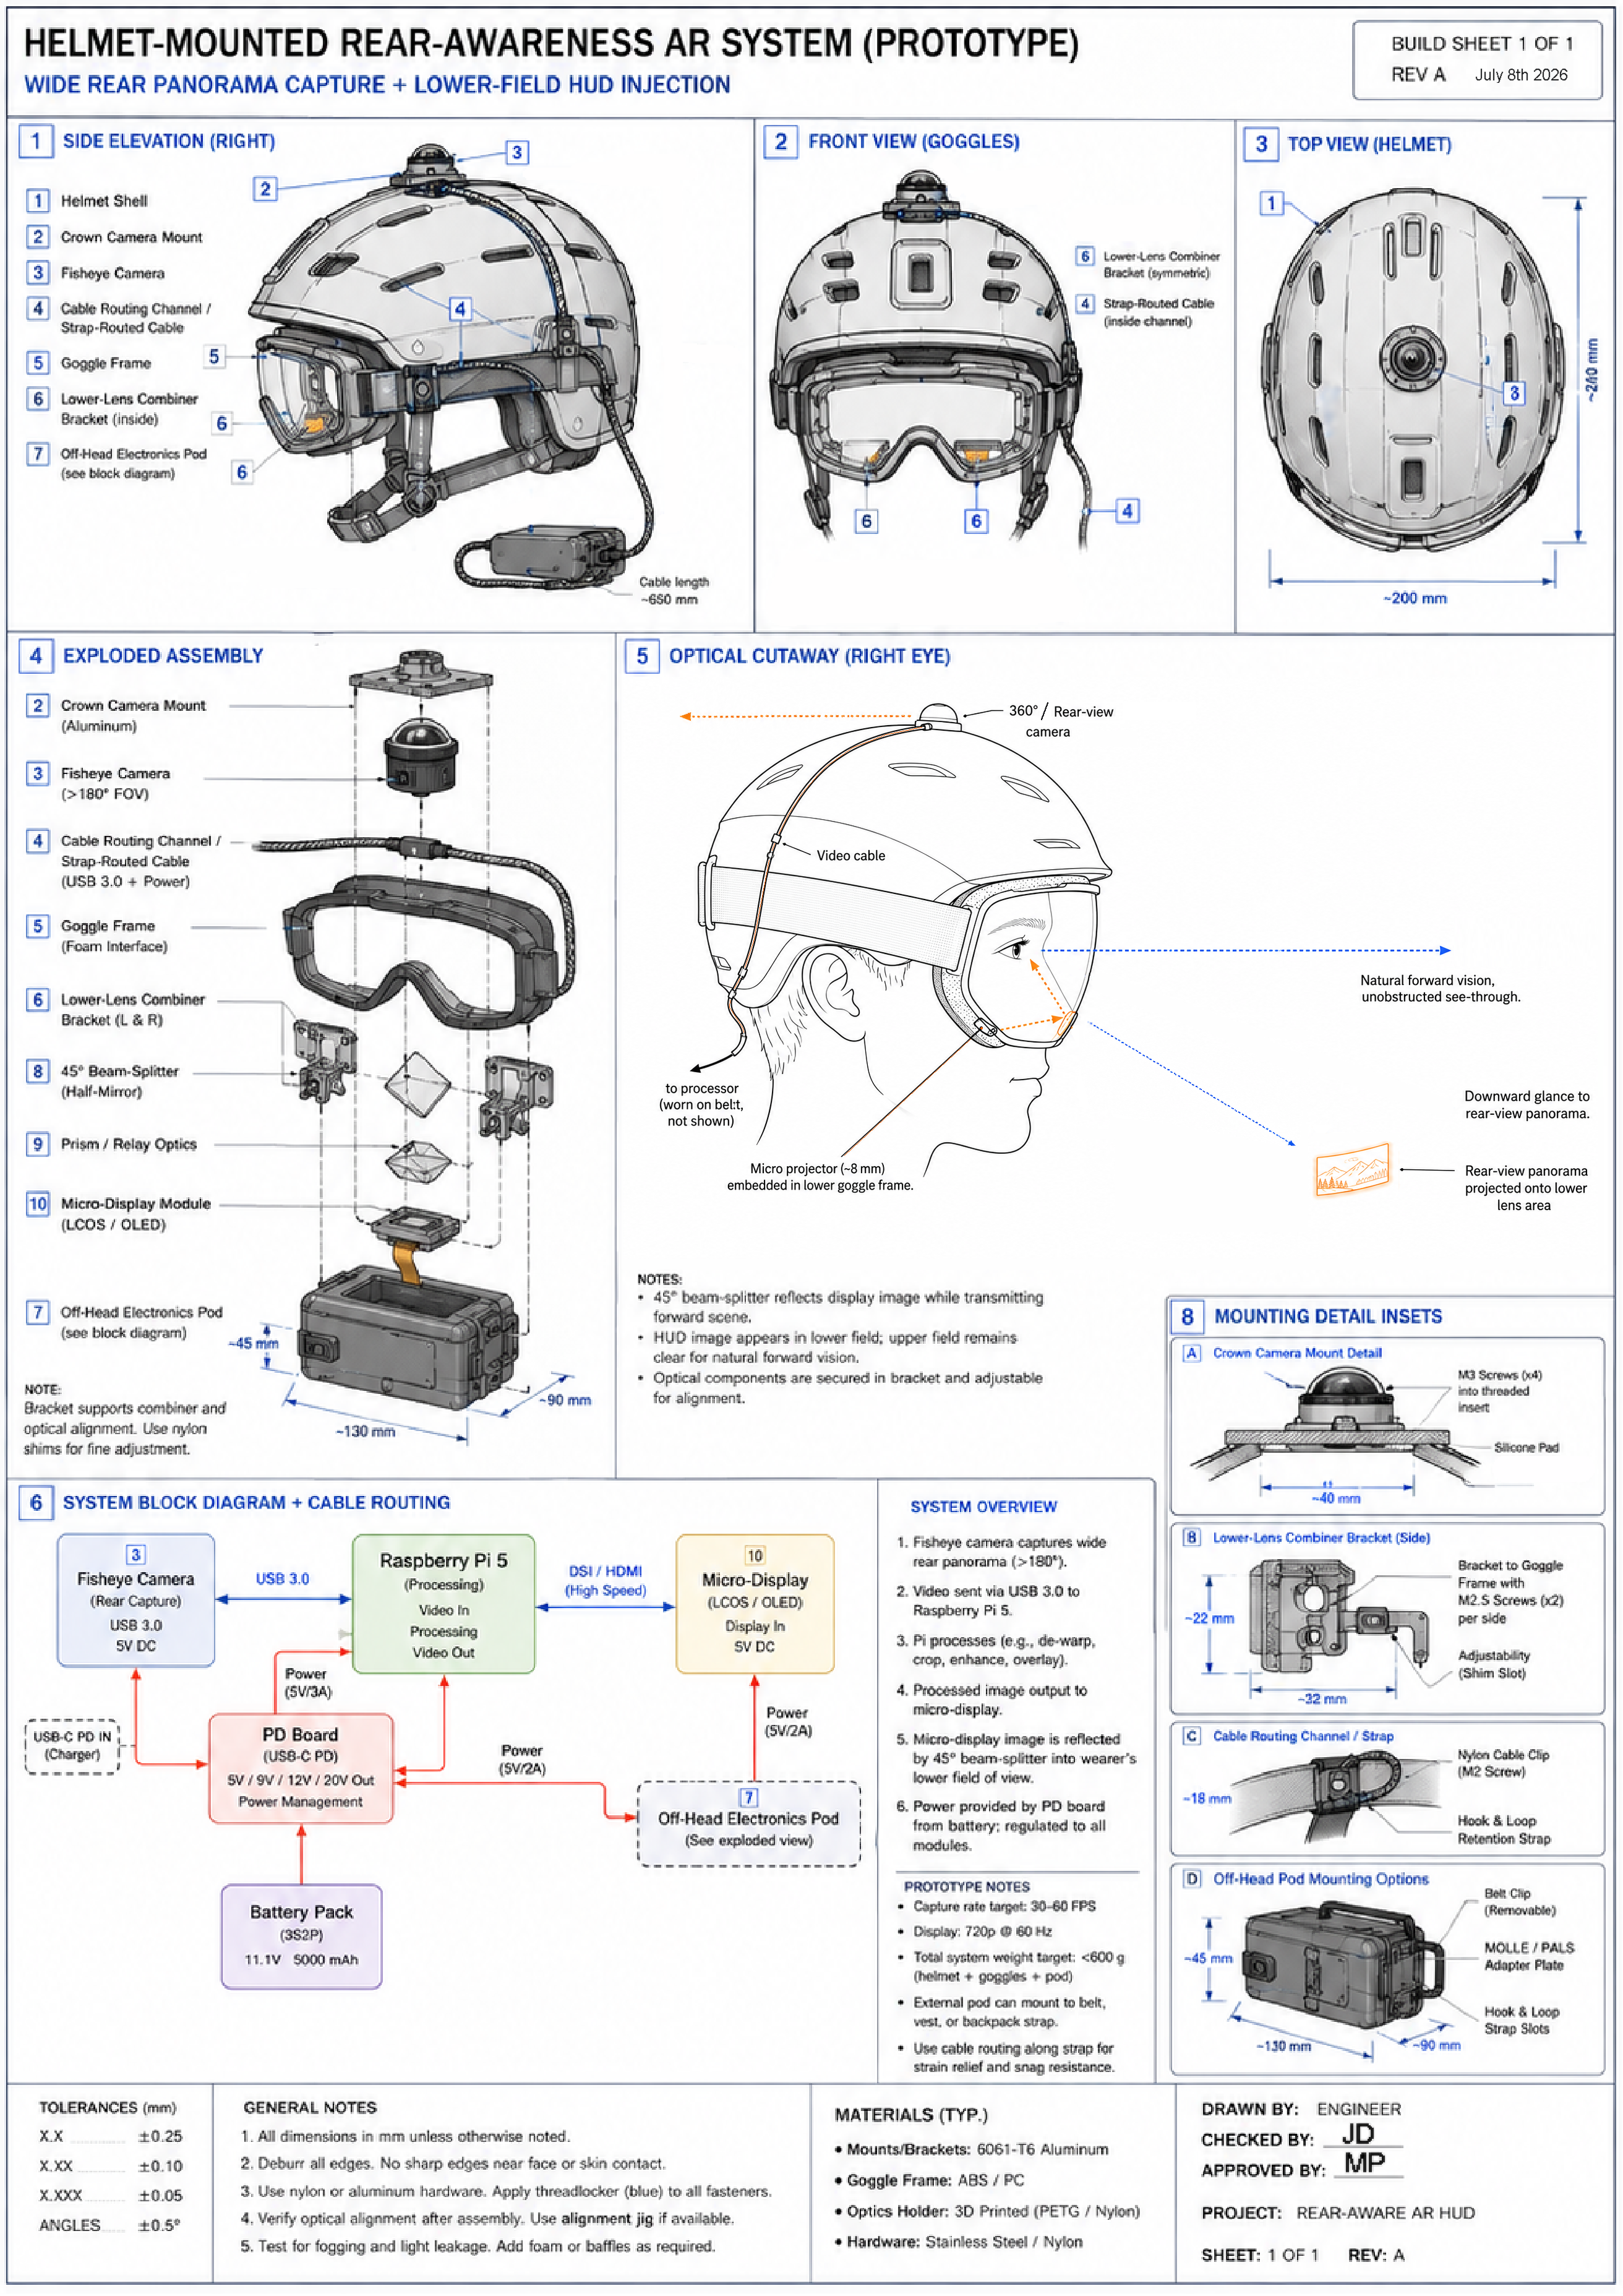
What it is. A wearable rear-awareness system. A crown-mounted wide-angle (fisheye) camera captures the rear hemisphere. A small single-board computer (SBC) dewarps and stabilizes that feed and renders a compressed panoramic "rear strip" onto a micro-display, which is optically combined into the lower portion of the wearer's visor or goggle lens. The wearer keeps normal, unobstructed forward vision through analog-translucent optics at all times; the digital image occupies only the lower visual field, where humans naturally tolerate reference information (like a car dashboard or bicycle computer).
The problem it solves. Cyclists, search-and-rescue (SAR) workers, industrial/mining workers, and skiers/ATV riders all suffer from a rearward blind zone. Shoulder-checks break forward attention and are impossible in some postures or helmets. Commercial answers are either narrow (rear radar such as Garmin Varia, no image) or extremely expensive and forward-focused (industrial AR helmets). This project gives continuous peripheral awareness of rearward motion for parts-cost in the low hundreds of dollars.
Who it's for. A university-level builder comfortable with Raspberry Pi/Linux, wiring, and basic electronics, who accepts a bespoke prototype and is willing to verify safety locally.
Limitations:
- This is a v1 pilot prototype, not certified safety equipment.
- Attaching anything to a certified helmet almost always voids its certification (EN 1078, ASTM F1447, EN 397, ANSI Z89.1) and its manufacturer liability. Addressed plainly in the Skills & Safety section.
- It is an awareness aid, not a substitute for shoulder checks or mirrors in traffic.
- Latency is ~175ms glass-to-glass in the recommended build; fine for detecting "something is approaching from behind," not for precision maneuvering.
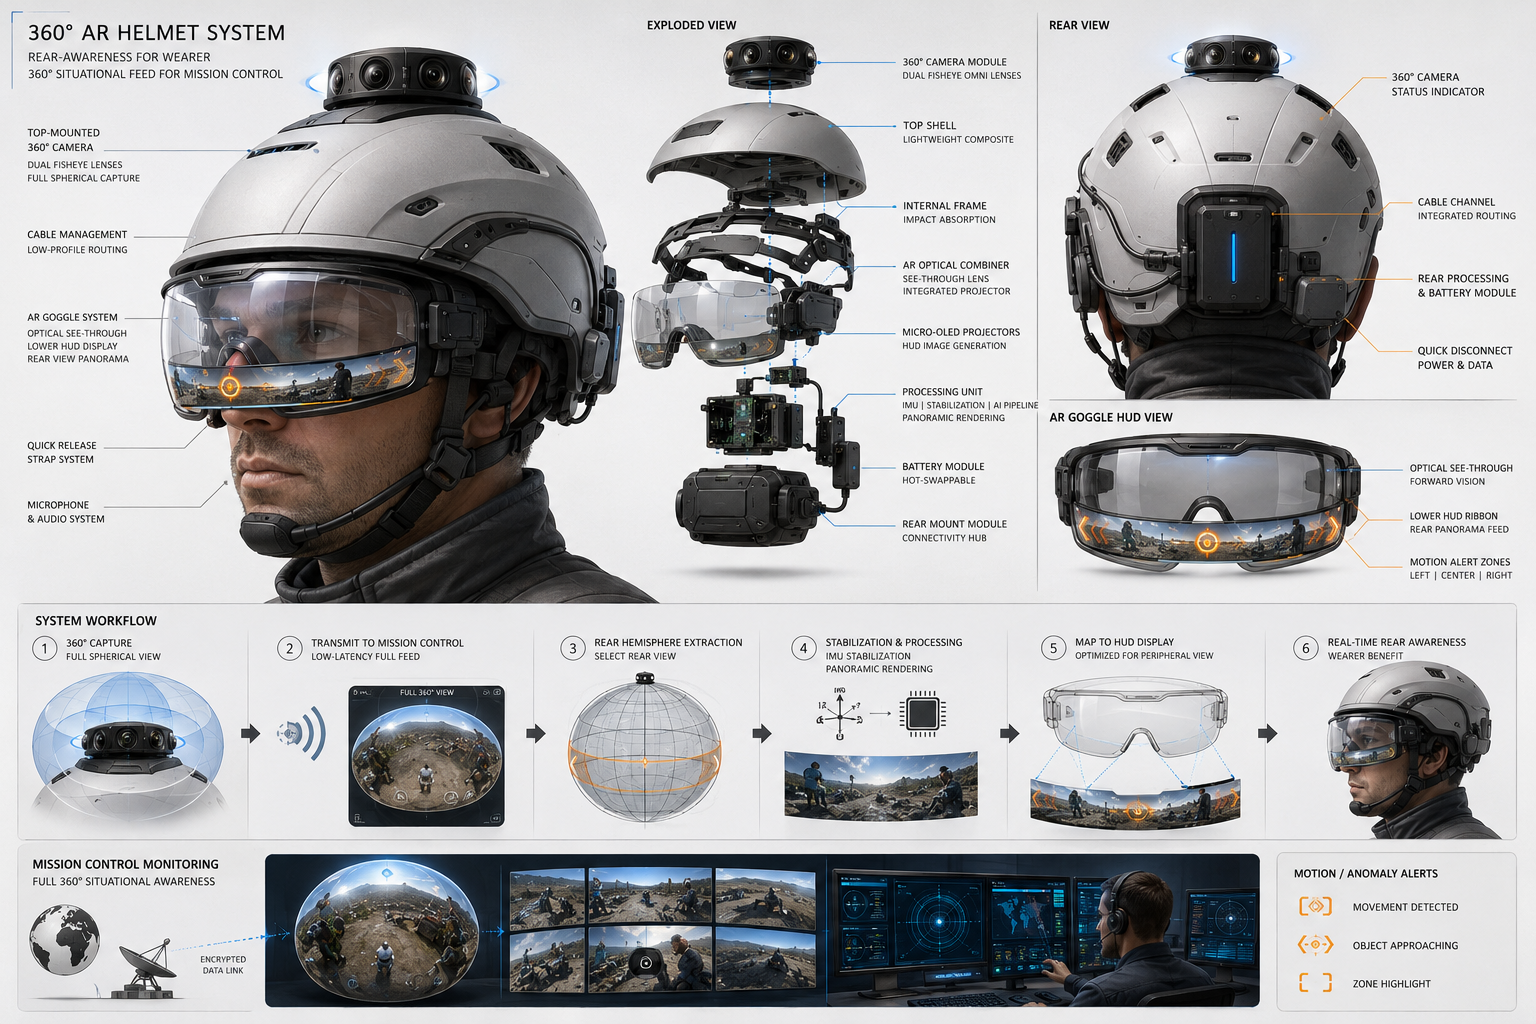
3. Design Rationale & Theory of Operation
3.1 Governing principles
Fisheye projection & dewarping. A fisheye lens maps the scene by an angular projection (commonly equidistant, r = f·θ, where θ is the angle from the optical axis and r the image radius) rather than the rectilinear r = f·tan θ of a normal lens. This is what lets one lens see ~180–200°. The cost is heavy barrel distortion. OpenCV models this with a camera matrix K and fisheye distortion coefficients D (k1–k4); the cv2.fisheye module is distinct from the pinhole model and must be used for wide lenses (a common failure mode is running fisheye images through the pinhole calibrator and getting "avant-garde-style drawings," as the StereoPi tutorials warn). To turn raw fisheye into a usable rear strip we build a remap table once and then apply it every frame with cv2.remap. As the remap table is precomputed, per-frame cost is just a memory-bound resample; cheap enough to run in real time on a Pi 5.
Why a panoramic "strip," not a rectified rectangle. The rear hemisphere is best shown as a wide, short panorama (a rear-view "letterbox"). We reproject the fisheye into a cylindrical/equirectangular strip: azimuth maps to horizontal position, a limited elevation band maps to the short vertical axis. This preserves "something is to my rear-left vs. rear-right" a spatial cue that matters for awareness.
Human lower-visual-field ergonomics. The lower visual field is where humans habitually place reference instruments and where gaze naturally drops without losing forward road/hazard awareness. Placing the HUD strip low and small keeps the primary forward field completely clear. This is a deliberate safety choice: the display must never occlude the forward hazard field.
Vergence accommodation & focal distance. A near micro-display seen directly would force the eye to focus at ~3 cm, uncomfortable and fatiguing. The combiner optic (a small lens/prism + semi-reflective surface) forms a virtual image at a comfortable distance. For v1 we set the virtual image at roughly 1–2 m so the eye's accommodation is close to its relaxed forward state, reducing the vergence–accommodation conflict that is a known cause of AR eye strain. We keep displayed content sparse and low to further reduce strain (INAIRSPACE.com).
Stabilization. Head motion makes a raw rear strip nauseating. An IMU (accelerometer + gyro + magnetometer, fused) on the helmet gives orientation. We counter-rotate the panoramic sampling window against measured head roll/pitch so the horizon in the rear strip stays level ("electronic horizon lock"). This is digital, not mechanical - no gimbal needed. Yaw is intentionally NOT fully cancelled (to allow the rear view to turn with you a little), only smoothed (Pimoroni.com)
3.2 Display-architecture tradeoff and the commitment
The analog forward visual requirement is absolute: the visor/goggle must stay analog-translucent; forward vision is never digitally mediated. That rules out any opaque or fully occluding display and rules out video-passthrough VR. Three viable see-through architectures were considered:
| Architecture | Pros | Cons | Verdict |
|---|---|---|---|
| A. Micro-OLED + combiner optic in lower lens (recommended) | Cheap, bright, high-contrast micro-OLED kits exist off-the-shelf with HDMI driver + magnifier prism; combiner can be beam-splitter or coated acrylic; fully see-through; proven in DIY HUD prior art | Requires careful optical alignment (eye relief, combiner angle); modest FOV | CHOSEN |
| B. Waveguide (diffractive/reflective) | Thin, elegant, large eyebox, used in commercial AR | Waveguide combiners are "technically sophisticated… usually hard to design," expensive, not DIY-fabricable | Rejected for v1 (cost + buildability) |
| C. Direct small transparent/peripheral LCD (no combiner) | Simplest; cheapest; transparent OLED/LCD panels exist | Image sits at panel focal distance (too near → eye strain); low brightness/contrast; transparent panels wash out in daylight | Kept only as the cheaper variant |
Why A wins: it is the only option that is simultaneously (1) truly see-through, (2) buildable with globally available parts and hand tools, (3) bright enough to read against real backgrounds (micro-OLEDs at 500–3000 cd/m²), and (4) cheap. Off-the-shelf 0.39" micro-OLED kits ship with the magnifier prism and HDMI driver board, collapsing most of the optical-engineering risk into a single $145 part.
3.3 Key parameter choices
- Captured FOV: ~180–200° per lens. A single crown-mounted fisheye covers the rear hemisphere; a dual-fisheye module covers full 360° for the upgrade path.
- Displayed FOV: a rear strip spanning ~180° azimuth (rear-left through rear-right), ~20–30° elevation band.
- Display resolution: 800×600 (0.39" kit) is plenty; the strip is downsampled anyway.
- Latency budget: ~150–200 ms glass-to-glass accepted for v1.
- Combiner angle: ~45° between micro-display output and eye line is the nominal starting point; fine-tuned per build.
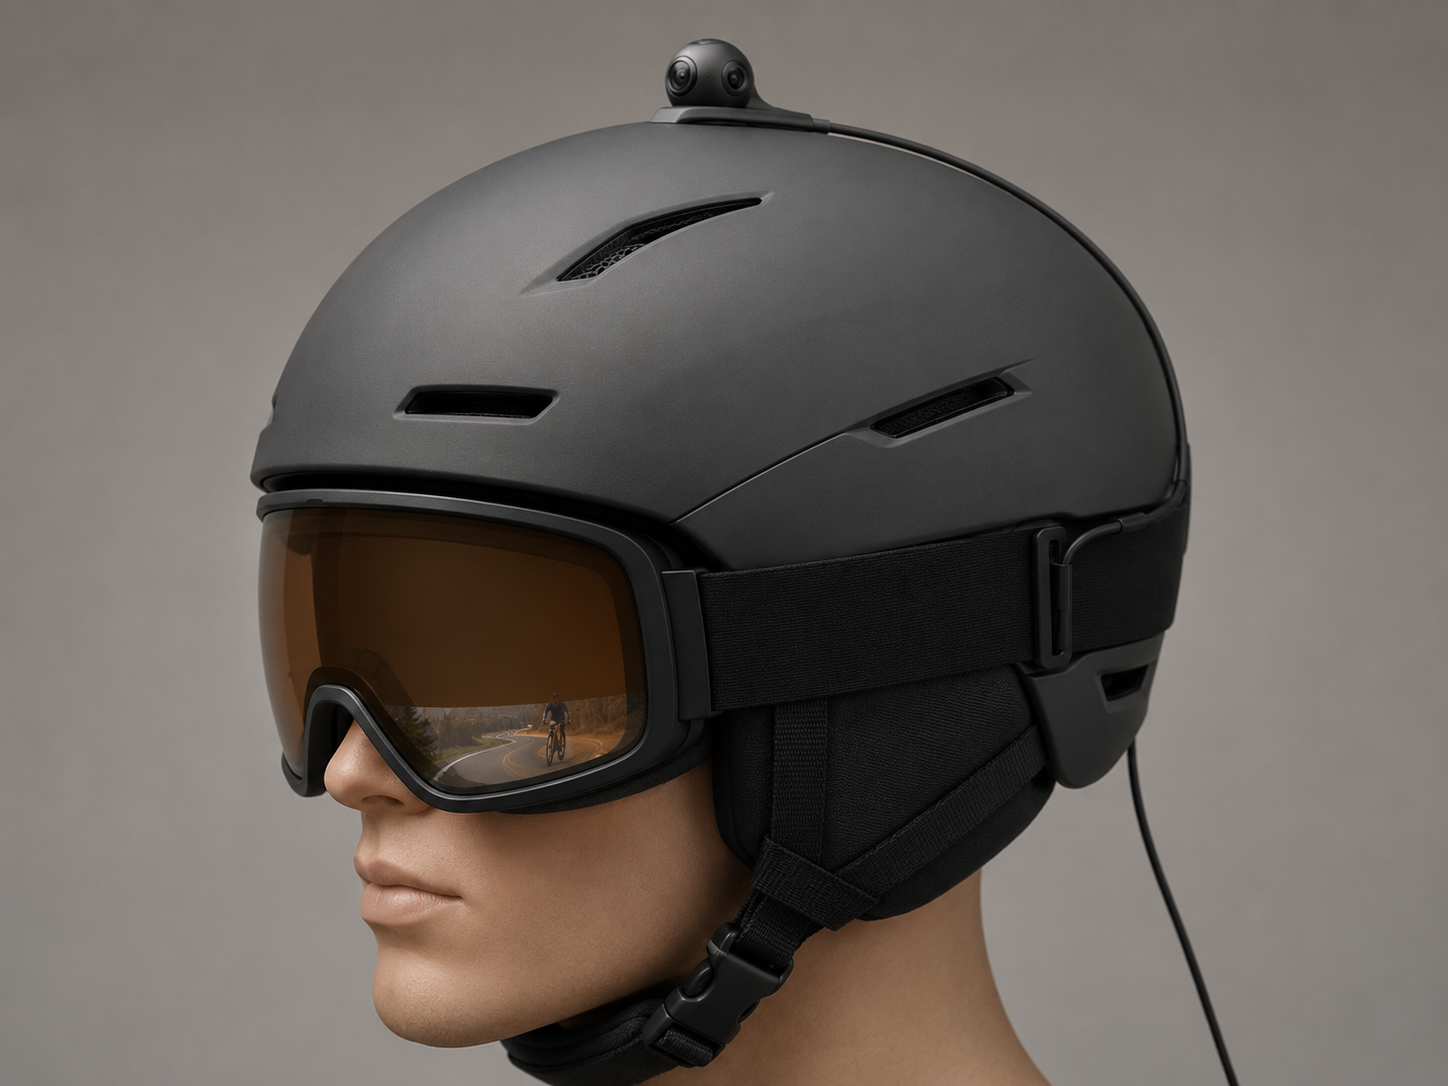
4. Specifications & Performance Targets
| Parameter | Target (v1 recommended) | Notes |
|---|---|---|
| Captured FOV | 180–200° (single fisheye) / 360° (dual) | Lens-dependent |
| Displayed FOV | ~180° az × ~25° el rear strip | Downsampled panoramic |
| Display | 0.39" micro-OLED, 800×600, 500 cd/m² | Higher-brightness (1800–3000 cd/m²) panels exist for daylight |
| Glass-to-glass latency | ~150–200 ms | Acceptable for awareness, not maneuvering; low-latency path = upgrade |
| Frame rate | 15–30 fps | 15 fps adequate for motion cueing |
| Power draw | ~7–12 W (Pi 5 + cam + display) | Pi 5 draws far more than Pi 4; budget accordingly |
| Battery runtime | 2–4 h on a 10,000 mAh USB-C PD bank | Scales with pack size |
| Added helmet mass | Target < 250g on-head; preferred max of ~500 g | Neck-strain & impact-safety concern |
| Operating temp | ~ -10 to +50 °C (limited by micro-OLED & battery) | 0.39" kit rated -10 to +70 °C; Li-ion cold/heat limits are tighter |
| Service life | Prototype; expect to iterate | Micro-OLED lifetime per its datasheet |
| Duty cycle | Intermittent-to-continuous; thermal-limited under sun | Active cooling recommended on Pi 5 |
Mass safety note: added mass on a helmet increases rotational and inertial loading on the neck in a crash and can change the helmet's certified behavior. Keep the heavy items (battery, SBC) off the helmet, when possible - (belt/vest mounted) with only the camera, display and combiner on the head. Optimize for cable management.
5. Bill of Materials
Prices are estimates in USD, single-unit, July 2026, and vary by region/date.
Recommended v1 path
| # | Item | Spec/size | Qty | Generic name (or specific model + why) | Est. unit | Line total | Source / notes | Salvage alt. |
|---|---|---|---|---|---|---|---|---|
| 1 | Single-board computer | Quad-core ARM, ≥4 GB | 1 | Raspberry Pi 5 (8 GB) — best-supported camera/OpenCV stack | $95 | $95 | Authorized reseller. Price volatile — DRAM crisis | Salvaged Pi 4 (8 GB); Pi 5 4 GB (~$75) |
| 2 | microSD card | 32 GB A1/A2 | 1 | Generic 32 GB microSD | $8 | $8 | Big-box/online | Reuse any ≥16 GB card |
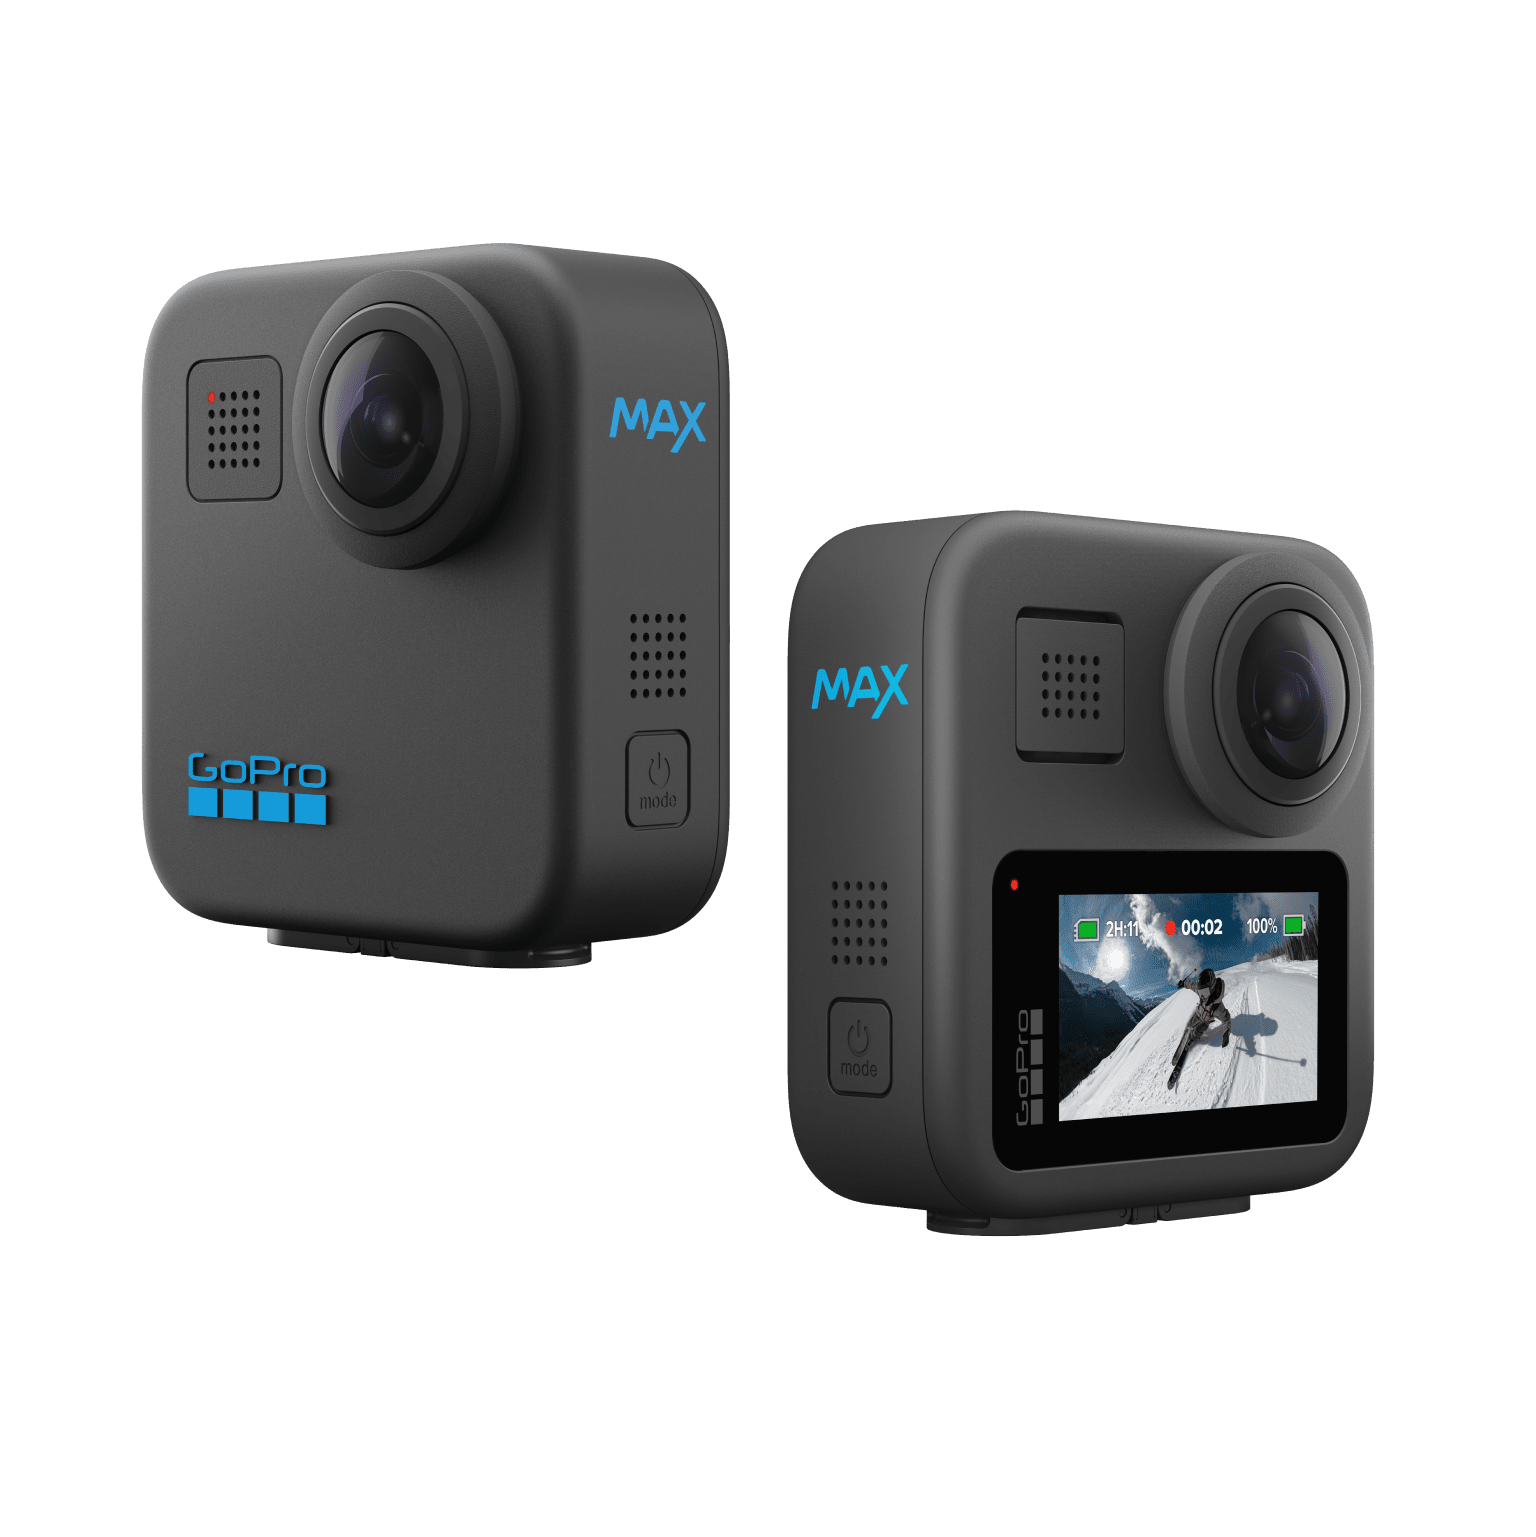
| 3 | Camera | Dual-fisheye USB, UVC | 1 | USB2.0 dual-fisheye 360 module (~180° ×2), UVC 1080p | $139 | $139 | Generic online marketplace (FEBON-class) | Salvaged Ricoh Theta / Insta360 / GoPro in USB webcam mode; single RPi wide cam |
| 3b | (Alt camera) | RPi Camera Module 3 Wide | 1 | Raspberry Pi Camera Module 3 Wide (120° FoV, autofocus); $35 MSRP, ~$38.50 retail | $38.50 | — | Authorized reseller (PiShop) | Any CSI cam + fisheye lens; std Camera Module 3 ~$29.25 |
| 4 | Micro-display kit | 0.39" OLED 800×600 + HDMI driver + prism | 1 | 0.39" micro-OLED kit w/ HDMI board & resin prism — ships with optics, collapses optical risk | $145 | $145 | Specialist microdisplay vendor (yxmicrodisplay) | Salvaged EVF from dead camera/camcorder |
| 5 | Combiner optic | 50/50 beam-splitter glass or coated acrylic, ~40–50 mm | 1 | Beam-splitter ("teleprompter") glass 50/50 | $15 | $15 | Optics/teleprompter supplier; eBay | Coated acrylic; salvaged game beam-splitter |
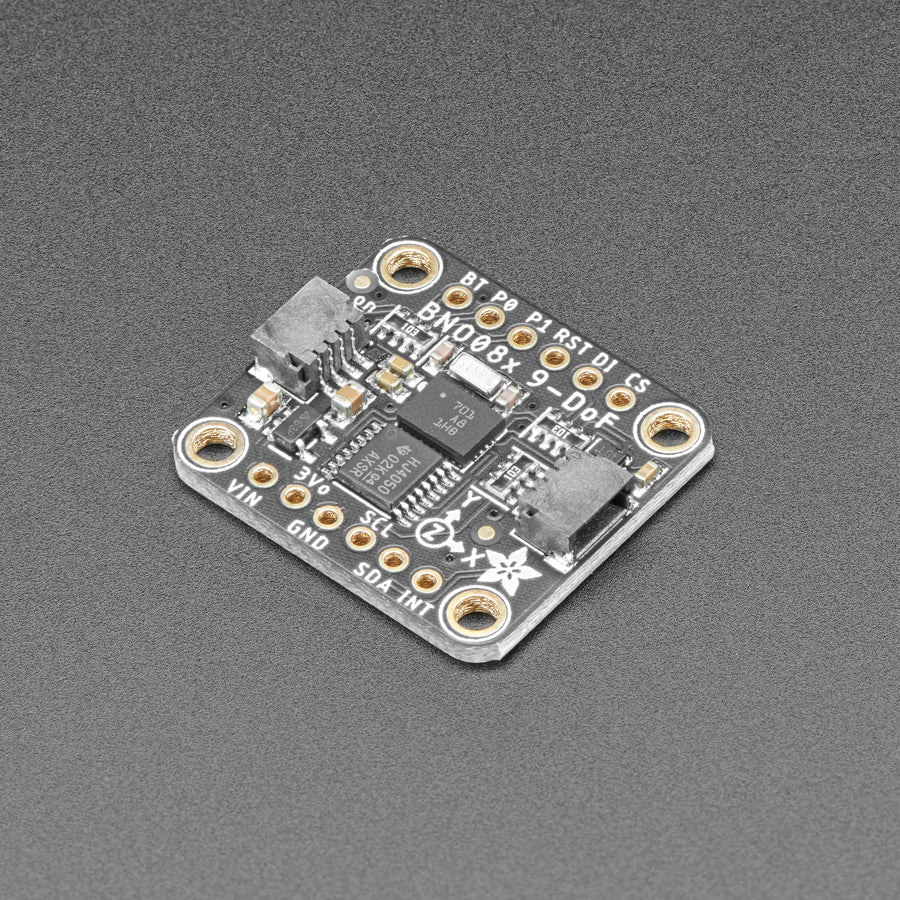
| 6 | IMU | 9-DOF fused | 1 | Adafruit BNO085 ($24.95, on-chip fusion → trivial horizon lock) | $24.95 | $24.95 | Adafruit / Mouser | MPU-6050/ICM-20948 (~$4–15, more code) |
| 7 | HDMI adapter | micro-HDMI → HDMI, short | 1 | Pi 5 micro-HDMI cable/adapter | $6 | $6 | Big-box | Salvage |
| 8 | Power bank | USB-C PD, 10,000 mAh, ≥27 W | 1 | USB-C PD power bank | $25 | $25 | Big-box | Reuse phone power bank |
| 8b | PD trigger board | PD→5V/5A for Pi 5 | 1 | USB-PD to 5V/5A converter board (Pichondria/GeeekPi-class) | $12 | $12 | Online | — |
| 9 | Helmet mounts | GoPro-style adhesive (curved+flat) | 1 kit | Generic GoPro-style adhesive mount kit (e.g. 8-pack: 4 flat + 4 curved + 3M pads) | $12 | $12 | Online marketplace | Salvaged action-cam mounts; zip-ties |
| 10 | Enclosure | 3D-printed PETG for SBC + battery | 1 set | Printed enclosure & combiner mount | ~$5 filament | $5 | Self-print or print service | Project box; foam |
| 11 | Wiring/consumables | Silicone wire, JST, heatshrink, standoffs | 1 set | Generic | $15 | $15 | Big-box/online | Salvage |
| 12 | Active cooler | Pi 5 heatsink+fan | 1 | Pi 5 active cooler | $7 | $7 | Reseller | Salvaged heatsink |
| Subtotal | ≈ $508–$525 |
Cheapest path (single rear cam, peripheral LCD)
| Item | Choice | Est. |
|---|---|---|
| SBC | Salvaged Pi 4 / Pi Zero 2 W | $0–35 |
| Camera | Single wide/fisheye USB or CSI cam | $15–38 |
| Display | Small transparent/peripheral LCD or salvaged EVF | $10–30 |
| Combiner | Coated acrylic | $5 |
| IMU | MPU-6050 | $4 |
| Power | Reused phone power bank | $0–15 |
| Mounts/wiring/print | Salvage + filament | $10 |
| Total | ≈ $210–290 (less with salvage) |
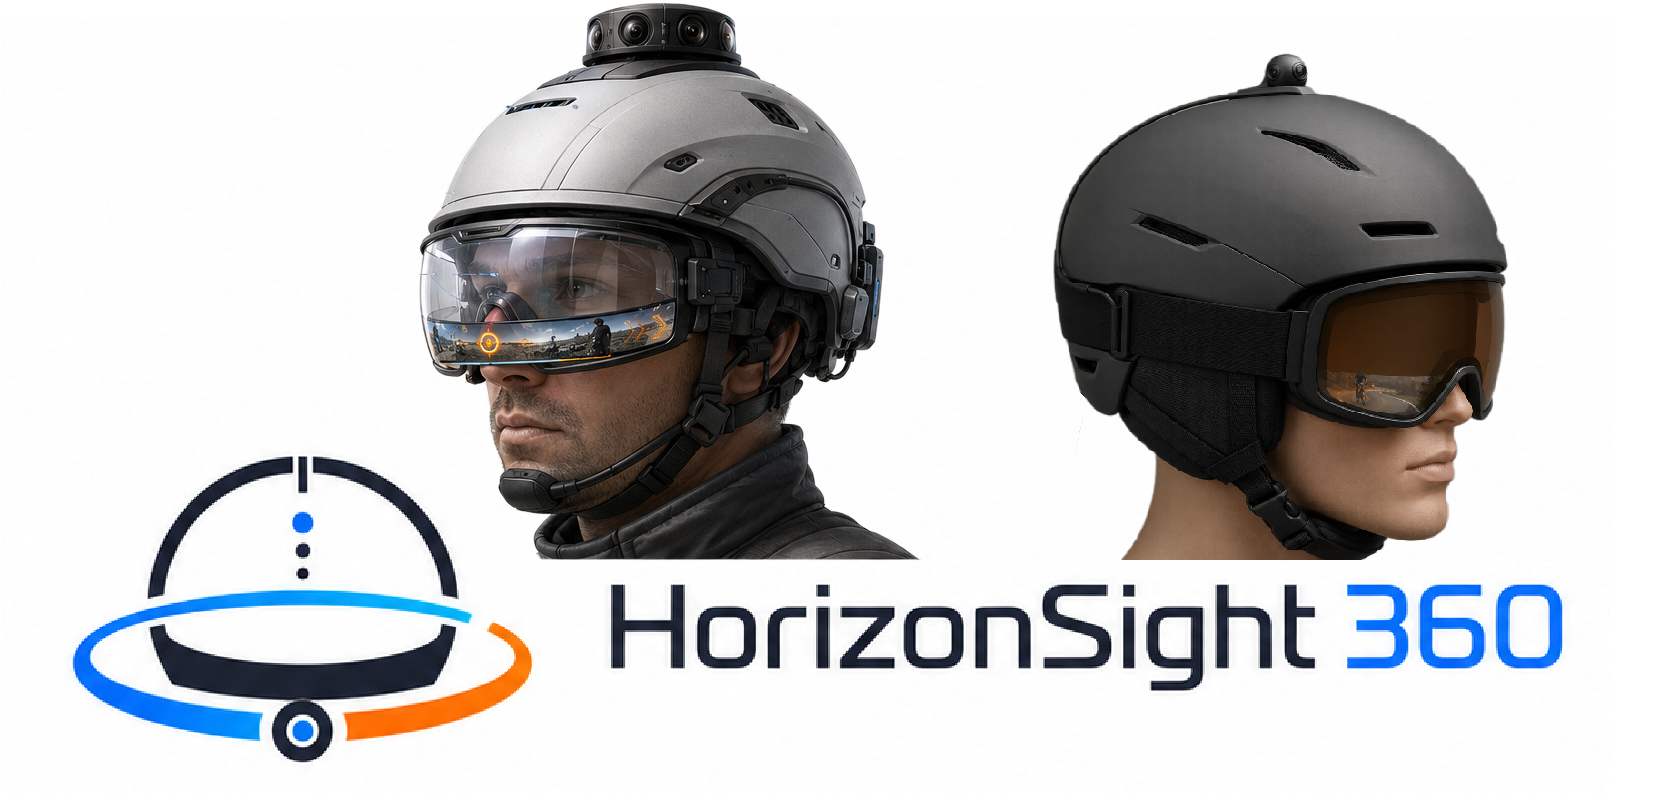
Upgrade path (HorizonSight 360) - added items
| Item | Choice | Est. |
|---|---|---|
| SBC | NVIDIA Jetson Orin Nano Super dev kit — "up to 67 TOPS… At just $249" Notebookcheck (NVIDIA), 102 GB/s, 7–25 W | $249 |
| AI accelerator (if staying on Pi) | Google Coral USB (Edge TPU, 4 TOPS, 2 W, MobileNet v2 ~400 fps) or Hailo-8 M.2 (26 TOPS) | $60–110 |
| Cellular | LTE CAT4 HAT/USB modem (Quectel-class) + data SIM | $50–90 + SIM |
| Bonded uplink (optional) | 2nd modem / bonding service | varies |
| Higher-brightness micro-OLED | 0.49" 1920×1080 1800 cd/m² | ~$150–300 |
| Protected 18650 pack | 2× protected 3500 mAh cells (~$10–25 each) + 2S BMS + holder | ~$30–60 |
| Upgrade delta | ≈ $600–900 on top of v1 |
Cost summary: Cheapest ≈ $210–290; Recommended v1 ≈ $510–700 with cables/tax; Full HorizonSight ≈ $1,300–2,000.
6. Tools & Equipment
| Tool | Category | Est. cost | Manual / borrow fallback |
|---|---|---|---|
| Soldering iron + solder | Likely owned | $25–40 | Borrow; makerspace |
| Multimeter | Likely owned | $15–30 | Borrow |
| Digital calipers | Likely owned/buy | $15 | Ruler (less precise) |
| 3D printer | Borrow/rent | $0 (service) | Online print service; hand-fab from ABS sheet/epoxy |
| PC/laptop | Likely owned | — | Required for OpenCV calibration |
| Small screwdriver/hex set | Likely owned | $10 | — |
| Hot-glue gun / epoxy | Buy | $8 | — |
| Heat gun (heatshrink) | Borrow | — | Lighter (carefully) or hairdryer |
| Helmet clamp/vise | Borrow | — | Hand-hold during work |
7. Skills & Safety
Required competencies: Linux command line; Python + OpenCV basics; soldering; reading a wiring diagram; basic 3D CAD or willingness to use provided files; patience for optical alignment.
Hazards specific to this build
- Modifying certified PPE voids certification! Bicycle helmets (EN 1078 / ASTM F1447), industrial helmets (EN 397 / ANSI Z89.1), ski helmets (EN 1077), and eye protection (ANSI Z87.1 / EN 166) are certified as tested. Drilling, gluing, adding mass, or attaching hardware almost always voids the certification and the manufacturer's liability. Under EN 397:2025, per JSP Safety's technical guidance, "helmet accessories that may affect conformity of the helmet (e.g. during impact testing), must be mounted during testing and effectively certified as compatible" - i.e., an untested accessory breaks compliance. Do not modify a helmet you rely on for occupational or legal protection. For a test build, use a dedicated, non-relied-upon helmet, or design the rig as a fully removable clip that does not penetrate the shell. State clearly to any user that the modified unit is not certified PPE.
- Lithium battery handling. Use protected cells or a quality PD power bank with BMS. Never charge unattended; never puncture/crush; keep the pack off the head; fuse the 5 V line. A brownout can crash the Pi mid-use.
- Added helmet mass & retention loading. Extra mass increases neck load and rotational injury risk in a crash and can defeat the helmet's energy management. Keep on-head mass minimal (target <250 g) and re-do a retention/strap check. Note that EN 397 chinstraps are designed to release at 150–250 N to prevent injury— do not obstruct this with your cabling.
- Vision obstruction & distraction. The HUD must stay in the lower field and be dimmable. Distraction is a primary concern. Never occlude the forward visual field.
- Night brightness / eye safety. Auto/manual-dim the display at night; an over-bright near-eye source degrades dark adaptation and causes strain.
- Soldering fumes / epoxy / hot glue. Ventilate; eye protection; avoid burns.
- Road legality. Some jurisdictions restrict head-mounted displays or helmet cameras/attachments for road users, and some regulate/prohibit the camera function on privacy grounds (Garmin ships the Varia camera with exactly this warning). Check local law.
Required PPE while building: safety glasses (soldering, cutting acrylic), vapor protection / ventilation for fumes.
8. Build Instructions
Reference parts by BOM #. Go/no-go checks are marked [GATE].
Phase 1 - Bench bring-up (compute + camera)
- Flash Raspberry Pi OS (64-bit) to microSD (#2); boot Pi 5 (#1) with active cooler (#12).
- Plug in dual-fisheye USB cam (#3). Confirm enumeration (
v4l2-ctl --list-devices) and grab a frame.
[GATE] You see two raw fisheye circles. - Install OpenCV, numpy, and your capture stack.
Phase 2 - Software pipeline
4. Calibrate the fisheye (checkerboard, cv2.fisheye.calibrate) → save K, D. 5. Build the remap table from fisheye to a rear-panoramic strip; apply with cv2.remap each frame.
6. Stabilize: read BNO085 (#6) over I²C; counter-rotate the sampling window for roll/pitch; smooth yaw.
7. Motion highlighting: run OpenCV MOG2 background subtraction (cheap) to outline approaching movement; optionally a lightweight object detection algorithm (YOLO, on Coral/Jetson in the upgrade). Draw a subtle box/arrow.
8. Output the composited strip to HDMI at the display's native timing.
[GATE] Strip is level when you tilt your head; approaching motion is highlighted.
Phase 3 - Display + combiner bench prototype
9. Drive the 0.39" micro-OLED kit (#4) from micro-HDMI (#7); confirm image. 10. On a bench (the "Lego-block" optical-bench method common in DIY HUD prior art), position micro-display, prism, and combiner glass (#5). Set combiner ~45°; adjust distances so the virtual image sits ~1–2 m away and is sharp. Set eye relief so the full strip is visible without hunting.
[GATE] You can read the strip and see straight through the combiner.
Phase 4 - Helmet integration & cable management
11. Mount fisheye at the crown, aimed to cover the rear hemisphere, on a GoPro-style adhesive mount (#9) - or a removable clip that does not penetrate the shell.
12. Mount combiner + micro-display in the lower lens region on a printed bracket (#10). Route the thin display + camera cables along a strap channel; strain-relief everything.
13. Keep SBC + battery off-head (belt/vest) with a single tidy umbilical, or in a rear counterweight pod if on-head.
[GATE] No cable can snag; nothing occludes forward view; retention still closes and releases properly.
Phase 5 - Battery & power 14. Power Pi 5 via PD bank (#8) + PD-trigger board (#8b) delivering 5 V/5 A. Fuse the line. Verify no undervoltage warnings under load (dmesg).
[GATE] 30-min run with no brownout/throttle.
Phase 6 - Field trials
15. Static test → walking test → intended-activity test at low intensity, in a safe area, with a spotter. Verify that the rear strip truly helps and never distracts from forward hazards.
Suggested figure captions: (P1) close-up of the two raw fisheye circles in the capture window; (P2) side-by-side of raw fisheye vs. dewarped rear strip with a level horizon line drawn; (P3) bench optical layout showing micro-OLED, prism, combiner at 45°, and the eye position, with the virtual image plane marked at ~1–2 m; (P4) helmet with crown camera and lower-lens combiner, cable routing highlighted; (P5) power umbilical and off-head pod.
9. Drawings & Schematics
Recommended free tools:
FreeCAD (enclosure, brackets),
KiCad (any custom PCB),
LibreCAD (2D fab drawings),
OpenSCAD (parametric mounts),
Inkscape (panel/labels).
Exploded view (describe): helmet shell; crown camera mount + fisheye; strap-routed cable; lower-lens combiner bracket holding beam-splitter at 45° and micro-display facing it through the prism; off-head pod with Pi 5, cooler, PD board, battery.
Fabrication drawings & tolerances:
- Combiner mount: combiner angle 45° ± 2°; display-to-combiner distance set at bench (±0.5 mm affects focus); eyebox aligned to wearer's resting gaze, biased low.
- Crown camera mount: rigid, aimed to place rear horizon in mid-strip; ±3° aim tolerance.
- Electronics enclosure: clearance for Pi 5 active cooler airflow; cable strain-relief; battery retained separately.
Wiring schematic (power tree):
USB-C PD bank ──▶ PD-trigger (5V/5A) ──▶ Pi 5 (fused)
Pi 5 USB ─────────────────────────────▶ Dual-fisheye USB camera
Pi 5 micro-HDMI ──────────────────────▶ micro-OLED HDMI driver ──▶ micro-OLED panel
Pi 5 I²C (SDA/SCL, 3V3, GND) ─────────▶ BNO085 IMU
(Upgrade) Pi USB3 ─────────────────────▶ Coral USB TPU
(Upgrade) Pi USB/HAT ──────────────────▶ LTE modem
ASCII side-profile optical path (lower-lens combiner):
        eye
         \  (line of sight, forward, THROUGH combiner)
          \        ______ combiner glass (50/50) @ ~45°
           \______/______________ forward world (see-through)
            \    /|
   virtual   \  / |  reflected HUD ray
   image ~1–2m \/  |
               /   |
        prism +    |
micro-OLED --+ (image source, faces up into combiner)10. Testing, Calibration & Validation
Pre-first-use safety checks (all must pass):
- Camera calibration: ≥15–20 checkerboard captures; fisheye reprojection error < ~1 px.
- Dewarp accuracy: straight rear reference lines map smoothly across the strip; no discontinuities.
- Horizon stabilization drift: tilt head ±30°, hold; residual horizon tilt in strip < ~3°; drift after 5 min within a few degrees (BNO085 fusion should hold it).
- Display alignment & eye-strain screening: strip readable at resting gaze without refocusing effort; run 10 min, self-check for strain/nausea; stop if present.
- Retention pull test after added mass: with rig installed, verify straps/retention still hold and release as designed; confirm on-head mass within budget.
- Battery load & thermal test: full-brightness, full-pipeline 30-min run; log Pi temperature; confirm no throttle/undervoltage.
- Glass-to-glass latency measurement: point the camera at a running millisecond stopwatch on a screen, photograph the stopwatch and the HUD strip together, subtract. Verify within the ~150–200 ms goal. (For reference, un-optimized Pi camera pipelines measure ~120–200 ms glass-to-glass by the stopwatch method on older Pi hardware; a Pi 5 with a precomputed remap should land in this range.)
- Motion-detection true/false-positive bench test: wave objects behind at varying speeds; log detections vs. false alarms; tune MOG2 thresholds until useful.
Do not rely on the system in real activity until every check passes.
11. Operation
Do: use it as a peripheral awareness aid; keep it dim at night; keep forward vision primary; power up and confirm the strip is stabilized before moving.
Don't: treat it as a substitute for shoulder checks/mirrors in traffic; stare at it; use it in heavy rain/fog beyond the camera's or your own limits; do NOT rely on it as certified PPE.
Operating envelope: day/night with brightness adjustment; avoid water ingress (prototype is not weather-sealed); thermal-limited under direct sun.
11.1 FAQ
What does it look like from inside?
A small, semi-transparent letterbox screen floating in space roughly 1–2 m ahead of you and about 25° below your normal gaze, which is about where the top of a car's hood sits, or where a bicycle computer would be if it hovered off the handlebars. Due to the combiner being half-mirrored, the real world remains visible through the panorama; the rear-view strip looks like a faint ghost overlay on whatever is actually down-forward of you (ground, hood, handlebars). It moves with your head like anything mounted to your goggles would, but it focuses like a distant object.
Would it appear in front of the user?
Yes; in front and below. Down-forward along your glance direction. Not pasted on the lens, not hovering at your nose. That's the whole trick: the physical display is at 25 mm, the apparent display is at 1.5 m.
How this avoids eyestrain and discomfort:
When you flick your eyes from the road (focused at 10+ m) down to the panorama (focused at 1.5 m), that's a small, fast, natural refocus, the way you've comfortably glanced at a car dashboard. Glancing at a screen focused at 25 mm would instead demand more accommodation than a human eye possesses; you'd see blur plus eyestrain from the failed attempt. The combiner geometry converts an impossible focal demand into a routine one. This is the same principle as a car windshield HUD or a teleprompter: the newsreader isn't focusing on the glass in front of the lens, they're focusing on the virtual image of the text placed near the camera's distance. Same physics, rotated 90°.
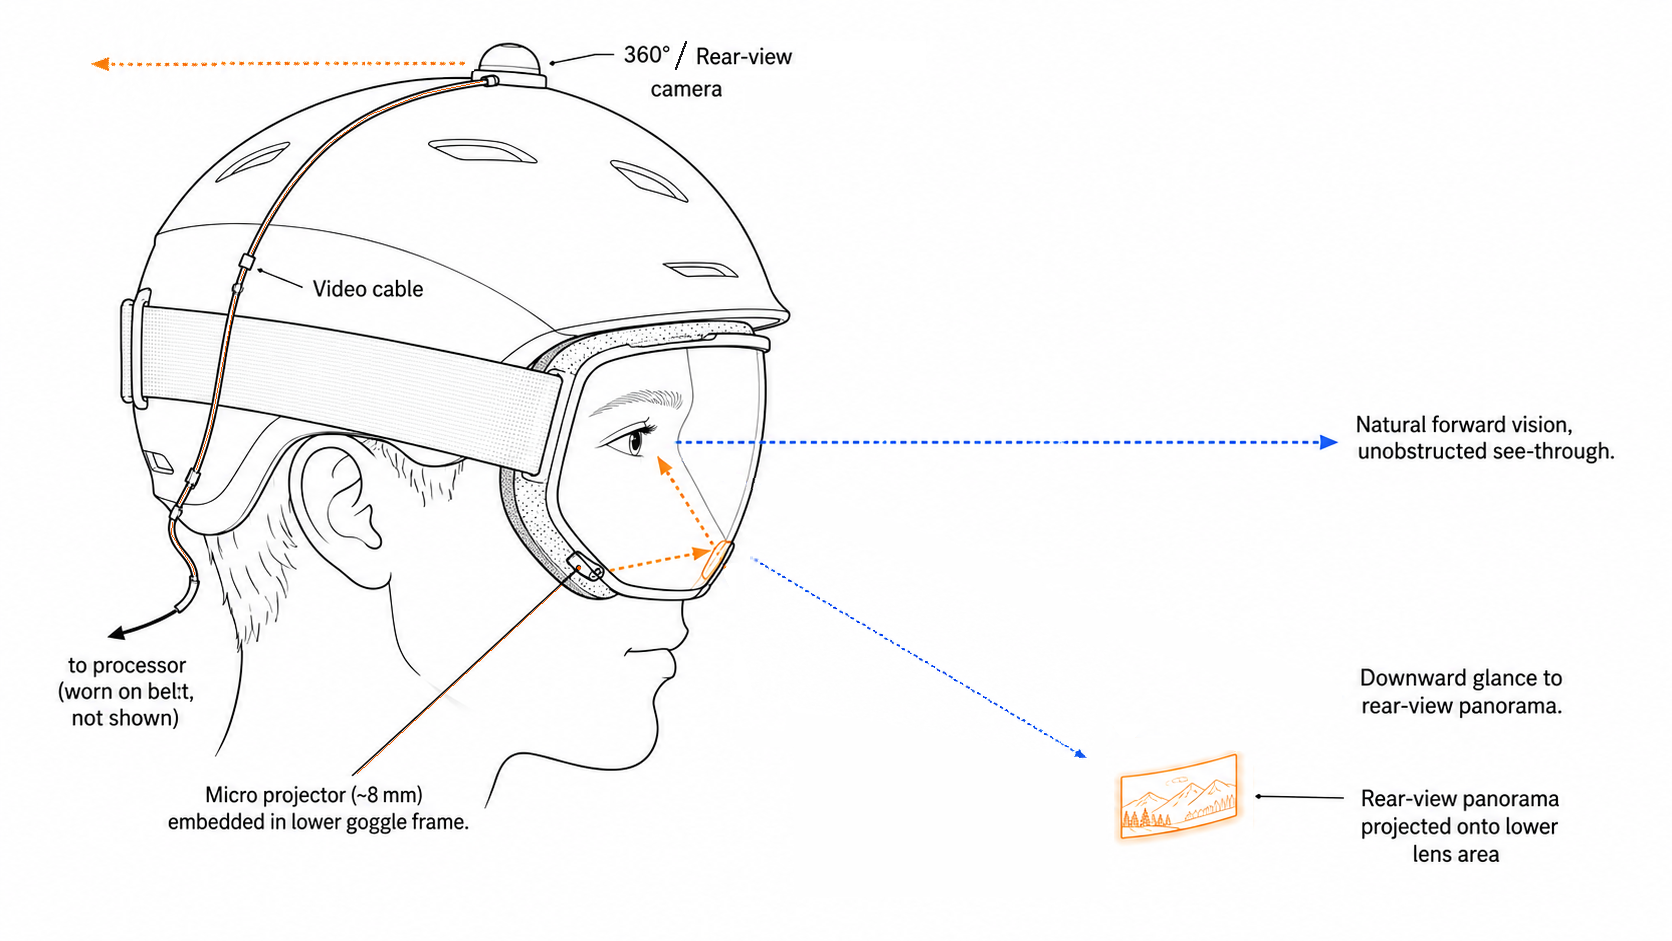
One practical implication: since the virtual image distance is set by the display-to-lens spacing inside the prism kit, you get this behavior essentially for free, as the kit's optics are pre-spaced. Your alignment jobs are the 45° combiner angle and aiming the eyebox at the wearer's natural downward glance.
12. Maintenance
| Interval | Task | Consumable/wear part | Est. cost |
|---|---|---|---|
| Each use | Wipe combiner & lens; check mounts/cables; battery charge | — | $0 |
| Weekly | Re-seat connectors; verify stabilization; inspect adhesive mounts | GoPro adhesive pad | ~$2 |
| Monthly | Re-run quick latency & motion check; clean fan/heatsink | — | $0 |
| ~6–12 mo | Re-calibrate fisheye; inspect battery health; replace worn cabling | Wire/JST | ~$10 |
| As needed | Replace micro-OLED (aging/burn-in) or battery | Micro-OLED / cell | $10–145 |
13. Troubleshooting
| Symptom | Likely cause | Fix |
|---|---|---|
| Video dropout | USB bandwidth / cable | Use USB3 port; shorten/replace cable; lower resolution/fps |
| Camera won't enumerate | UVC/driver | Check v4l2-ctl; try another port; confirm module powered |
| Choppy/high latency | CPU-bound dewarp | Precompute remap; lower fps/res; offload to Coral/Jetson |
| Thermal throttling | No cooling under sun | Fit active cooler; shade the pod; reduce clocks |
| IMU drift / tilted horizon | Magnetometer/calibration | Recalibrate BNO085; add complementary filter; keep IMU away from magnets/motors |
| Combiner fogging | Humidity/temp | Anti-fog coating; small vent; warm-up |
| Battery brownout / undervoltage warnings | Weak PD negotiation | Use 5V/5A profile + PD-trigger board; thicker/shorter cable; bigger pack |
| Software crash | Pipeline exception | Run under a systemd watchdog/supervisor that auto-restarts the vision service; log to file |
| Washed-out HUD in daylight | Display too dim | Use higher-nit micro-OLED; increase combiner reflectivity; shade |
14. Variations, Scaling & Customization
- Cheaper version: single rear standard/wide camera, no stitching, small peripheral transparent LCD or salvaged EVF. ~$210–290. Loses full 360°, dimmer, but proves the concept.
- HorizonSight 360 upgrade: Jetson Orin Nano Super (67 TOPS) or Pi 5 + Coral/Hailo for on-board 360 stitch + object detection; stream a full spherical feed to remote mission control over WiFi/LTE via WebRTC (≈200 ms achievable on Pi-class hardware with MediaMTX/pi-webrtc; RTMP for record-only). Budget extra bandwidth (1–5 Mbps typical LTE uplink; more for full sphere), power, and thermal headroom; consider bonded cellular for reliability; add a signaling/relay server for NAT traversal.
- Per-helmet integration:
- Bicycle (EN 1078/F1447): minimize mass, aero pod on rear; strong road-legality caveat.
- SAR: ruggedize, weatherproof, add mission-control streaming; helmet often non-certified-critical.
- Industrial/mining (EN 397/Z89.1): accessory-compatibility is a certification issue under EN 397:2025 - use only vendor-sanctioned accessory rails; consider intrinsically safe (ATEX) constraints in gas/dust zones.
- Ski/ATV goggles (EN 1077): integrate combiner into goggle lower lens; cold-rated battery kept in a warm pocket.
- Regional adaptation: source SBC/camera locally; verify voltage/charger and radio (WiFi/LTE band) legality.
15. Cost Analysis
| Solution | Approx. cost | What you get |
|---|---|---|
| This build — cheapest | $210–290 | Rear motion awareness, DIY, repairable |
| This build — v1 recommended | $510–700 | Stabilized 360-capable rear HUD, see-through |
| This build — HorizonSight 360 | $1,300–2,000 | Above + remote mission-control streaming + on-board AI |
| Garmin Varia rear radar (RVR315) | $149.99 | Radar alert only (140 m range, 51 g), no image |
| Garmin Varia radar + camera (RCT715) | $399.99 MSRP | Rear radar + 1080p recording, no live HUD |
| Garmin Varia RearVue 820 | $299.99 | Radar + brake light, threat/size tracking, no image |
| RealWear Navigator 500 | ~$2,300 (quote-only; est.) | Industrial monocular assisted-reality (forward, not rear) |
| Trimble XR10 + HoloLens 2 | ~£4,450 (~$5,600) | Hard-hat mixed reality (forward) |
| Industrial AR smart helmet (enhanced) | multiple $1,000s | Forward AR + comms |
Interpretation: No commercial product does exactly what this does (a stabilized, see-through rear HUD). The closest safety analogue, Garmin Varia, gives only a radar alert with no image (RVR315) or records without a live HUD (RCT715), yet costs $149.99–399.99 - so the cheapest build is cost-competitive while adding an actual rear view. Commercial AR helmets cost 3–10× the full upgrade path and are forward-focused. Payback is really about capability you can't otherwise buy at this price, plus full repairability and no subscription/lock-in.
Total build time: ~30–50 h.
16. References, Prior Art & Attribution
- OpenCV — fisheye camera model & calibration (
cv2.fisheye), MOG2 background subtraction,remap. - Raspberry Pi — camera stack (libcamera), Pi 5 platform, OS.
- DIY HUD / smart-glasses prior art — Hackaday "homemade Google Glass" builds (beam-splitter + micro-display + prism; "Lego-block" optical alignment); the $60 Bluetooth head-mounted display; June_Glasses (ESP8266 HUD) on GitHub; INAIRSPACE DIY HUD guides (vergence–accommodation, combiner, exit-pupil).
- Fisheye/stereo tooling — StereoPi fisheye calibration tutorials; surround-view fisheye projects on GitHub.
- Streaming — TzuHuanTai/RaspberryPi-WebRTC; MediaMTX WebRTC on Pi 5.
- Standards to check locally — EN 1078, ASTM F1447 (bicycle); EN 397 (incl. 2025 revision, Type 1/Type 2), ANSI/ISEA Z89.1 (industrial); EN 1077 (ski); ANSI/ISEA Z87.1, EN 166 (eye protection).
- Commercial comparators — Garmin Varia line (RVR315, RCT715, RearVue 820); RealWear Navigator 500; Trimble XR10.
17. License & Contribution
- Hardware: CERN-OHL-S v2 (strongly reciprocal). Distribute your source (CAD, wiring, BOM) with any hardware you make/sell based on this.
- Documentation: CC BY-SA 4.0 (attribute, share alike).
- Contribute back: fork the repo, improve the optics/mounts/software, publish your calibration files and STLs, and share latency/mass measurements per helmet type so others can build on real data.
Recommendations
- Build the recommended v1 first, on a dedicated throwaway helmet; do not touch relied-upon PPE. Prove the pipeline on the bench (Phases 1–3) before you ever attach anything to a helmet. Threshold to proceed to head-mounting: dewarped strip stays level under ±30° head tilt and MOG2 reliably flags approaching motion.
- Keep mass off the head. Belt/pack-mount the Pi 5 and battery; only camera + combiner + display go on the helmet. If on-head mass exceeds ~250 g, redesign before field use; hard-stop at 500 g.
- Gate every field trial on the §10 checklist, especially the retention pull test and a measured glass-to-glass latency within 150–200 ms. If latency exceeds ~250 ms, precompute the remap and drop resolution/fps before adding hardware.
- Only spend on the HorizonSight upgrade once v1 is genuinely useful. The trigger to move to a Jetson Orin Nano Super ($249) or add a Coral USB ($60–110) is a concrete need for real-time object classification or live spherical streaming, not before. For streaming, target ≥2 Mbps sustained LTE uplink and add bonded cellular only if you see dropouts.
- Budget defensively on the SBC. Pi 5 pricing is swinging with the DRAM market; if the 8 GB is inflated when you buy, a salvaged Pi 4 8 GB or a Pi 5 4 GB is an acceptable v1 substitute. Re-check prices the week you order.
- Document and publish your calibration files, STLs, and measured latency/mass per helmet type under the project licenses so the next builder starts from data, not guesses.
Caveats
- This is a v1 prototype, not certified equipment, and it is an awareness aid, never a replacement for shoulder checks, mirrors, or certified PPE.
- All prices are estimates and were captured in July 2026; SBC/RAM prices in particular are unusually volatile (the Pi 5 has seen repeated price hikes). Verify before purchase.
- The measured-latency reference figures (~120–200 ms) come from older Raspberry Pi camera pipelines, not a published Pi 5 OpenCV fisheye-dewarp benchmark; measure your own build.
- The RealWear Navigator 500 comparison price is an estimate — vendors sell quote-only; treat ~$2,300 as indicative, not authoritative.
- Certification and road-legality vary by jurisdiction and change over time (e.g., EN 397 was revised in 2025). What is legal/compliant where you build may differ.
- Micro-OLED daylight legibility, combiner ghosting, and IMU magnetometer drift are the most likely real-world disappointments; plan for a higher-nit panel, an anti-reflective combiner, and careful IMU siting away from motors/magnets.
This is community documentation provided as-is; prices are estimates; the builder is solely responsible for local code compliance, PPE/certification decisions, and safe practice.
 wangfred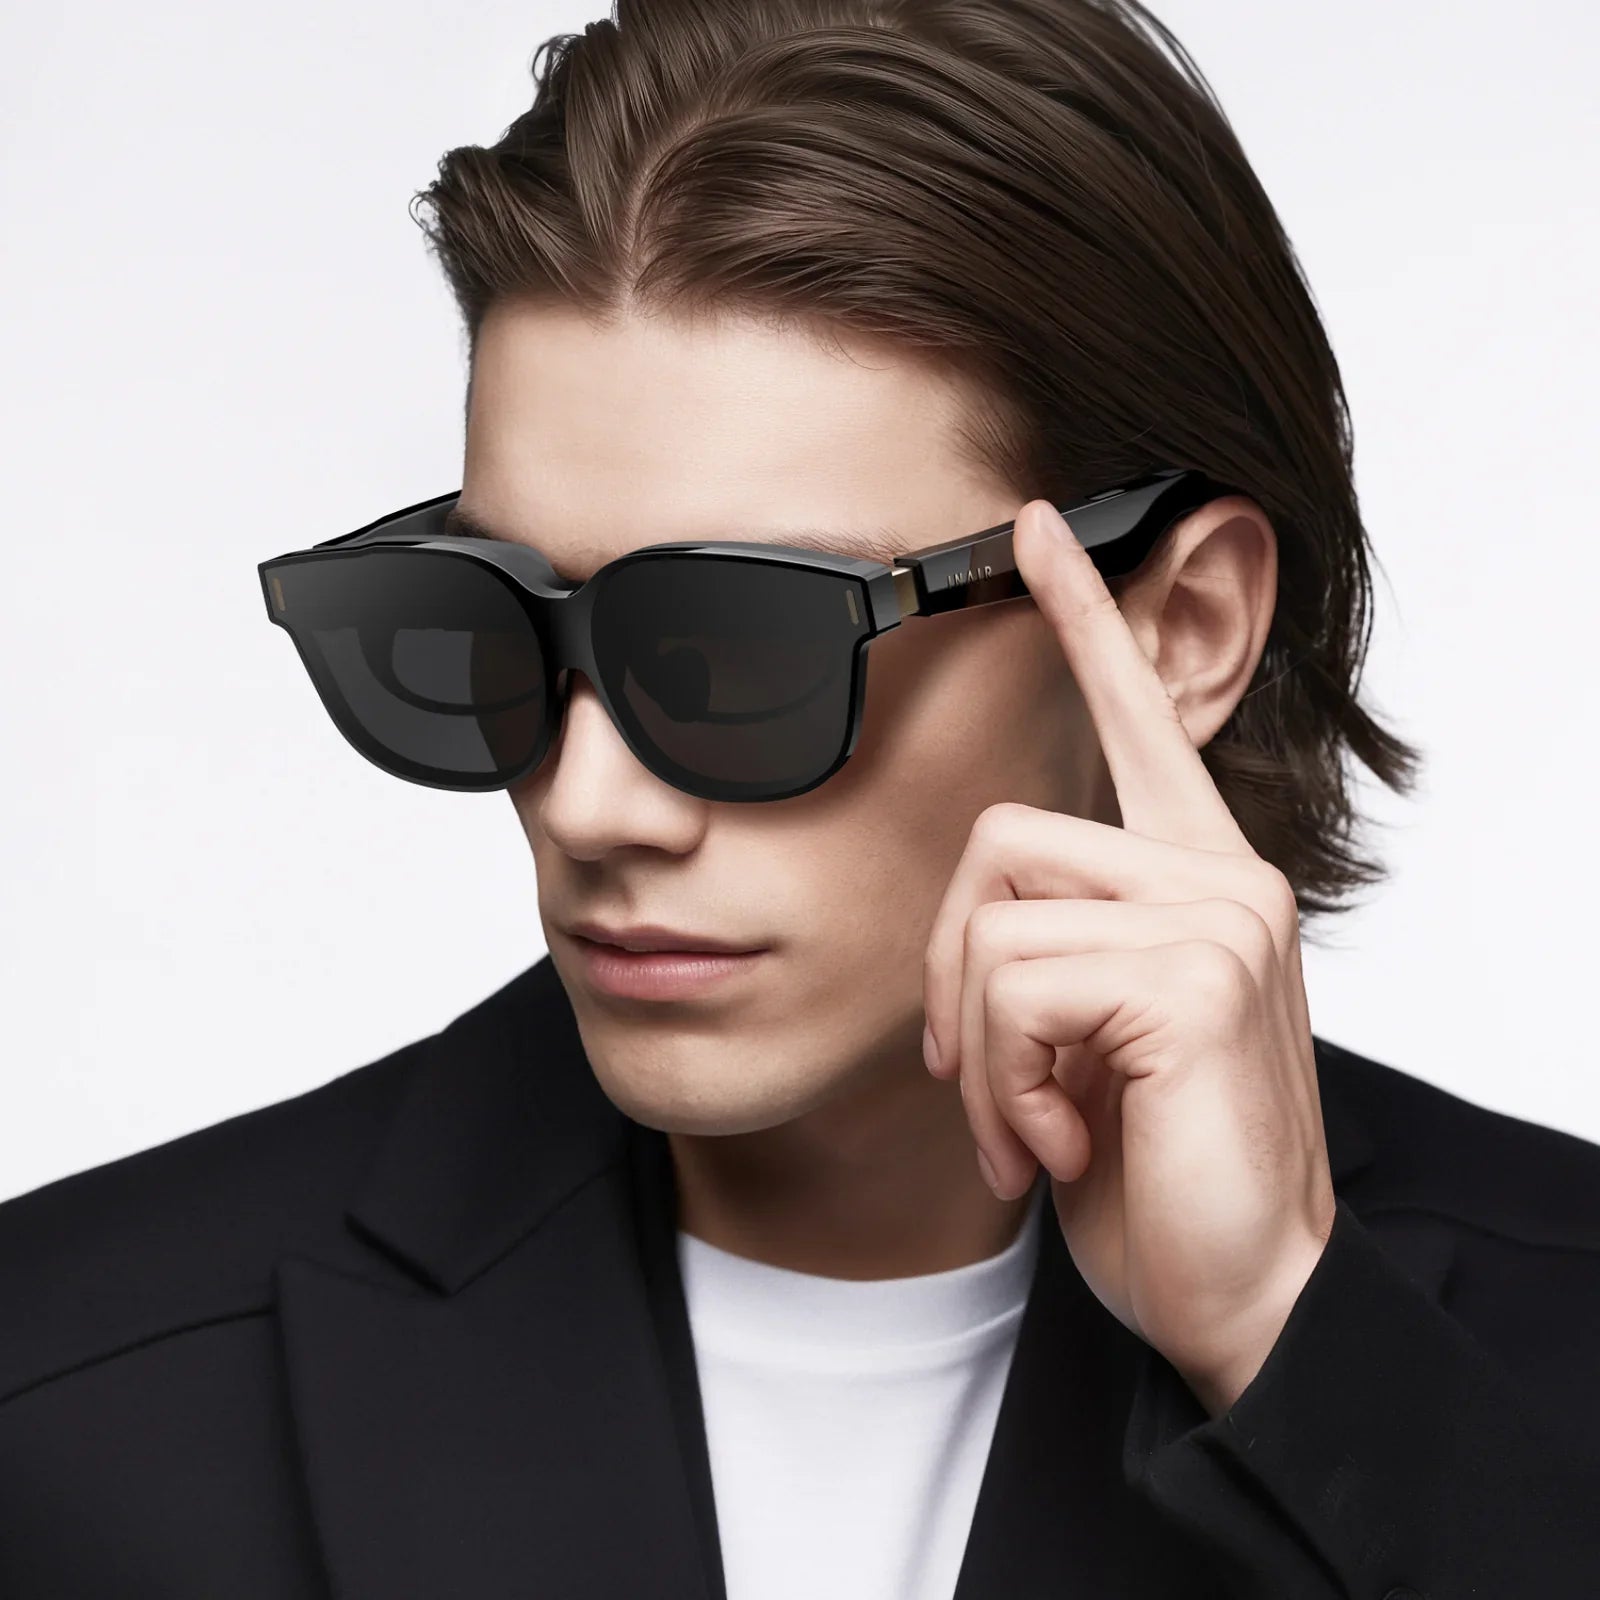
 Adafruit